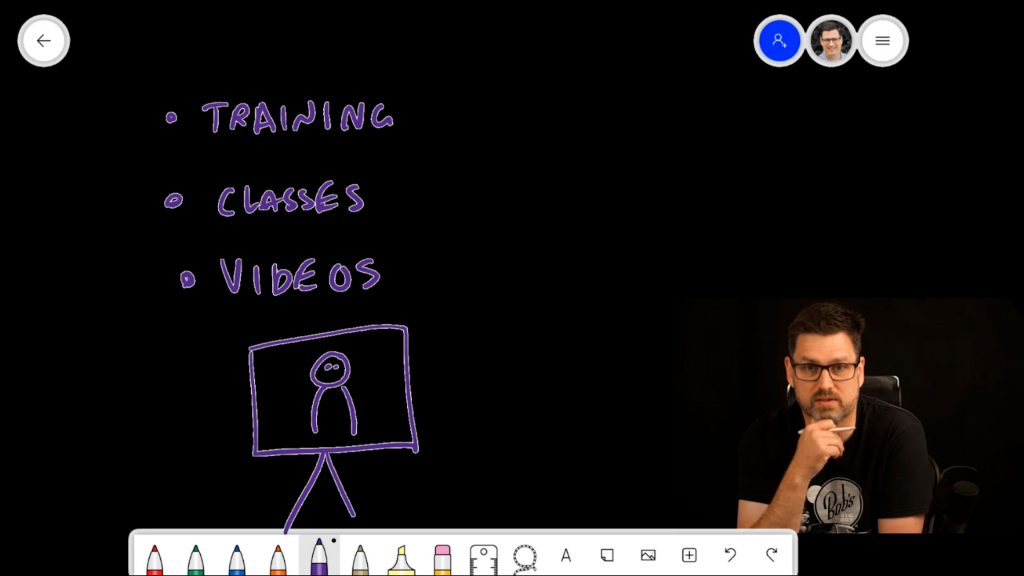
Have you ever seen a Lightboard video? It’s basically a whiteboard-style presentation, but delivered through glass. So you can see the presenter as they do their work. Sure, you could just use a regular whiteboard. But the trouble with that is; your back is towards the audience. And in an online presentation, even with the Whiteboard app, you basically have the same issue. Your video and the content you are sharing are separate. People will focus on the content window, not you. So a DIY glassboard/lightboard setup where you can make eye contact with the audience while you create and teach seems like just the right thing. If you have the space… and the DIY chops! Hopefully this blog can help you out.
Not the first to think of a DIY Glassboard/Lightboard
Scott Hanselman is a partner program manager at Microsoft. He recently shared a video showing how you could set up a virtual Lightboard or Glassboard with your Surface and an app called OBS Studio. But this idea was from a blog post by Rob Farley, a fellow Aussie from the Microsoft Data Platform world. Scott was excited by Rob’s idea, and I was blown away to see what Scott was doing with it. It’s a little technical, but it’s actually very achievable if you’re a little tech savvy. Just follow the steps mentioned later in this blog. But first, why would you use OBS?
Why use OBS?
In our recent “Science Behind the Surface Pen” series, we talked about the effectiveness of Low Formality presenting. That is when you build the content in front of the audience as you go. A 2008 study by Savoy; Proctor and Salvendy found that in the age of the PowerPoint Presentation, “chalk and talk” teaching is still important. If students are expected to retain information and/or concepts that are best conveyed through dialogue or verbal explanation, traditional presentations [that is Chalk and Talk] appear to be best.
So this tool (OBS) – while it might be a little technical to set up and understand – allows you to chalk and talk in a very engaging and personal manner. Plus, you can present online from anywhere! You can use it live for your classes and training, or you can use it to record videos for your audience.
What you need to make your own DIY Glassboard/Lightboard
First, you’ll need OBS Studio. It is a free, open source software, and it’s quite powerful. So it can be a little overwhelming at first. But I’m going to walk you through this setup step by step so that you can recreate it. I’m going to use the Surface Studio. But you could do this on any 2 in 1 device with pen support. This solution does work your processor a little extra, so on older or low spec models you might find that performance suffers.
Second, it helps to have two screens to use, but it’s not essential. Surface devices have the best built-in webcams on the market, but I’m going to recommend that you have your device flat on the desk for this setup. If you have your device flat, your Surface webcam is going to be looking straight up your nose which is not brilliant! By the way, we wrote a blog on using external webcams with your Surface recently.
Third, it’s ideal to have a dark, uncluttered background and good lighting. You want to make it easy for your audience to focus on your presentation, not on your dodgy lighting.
Step 1: Setup
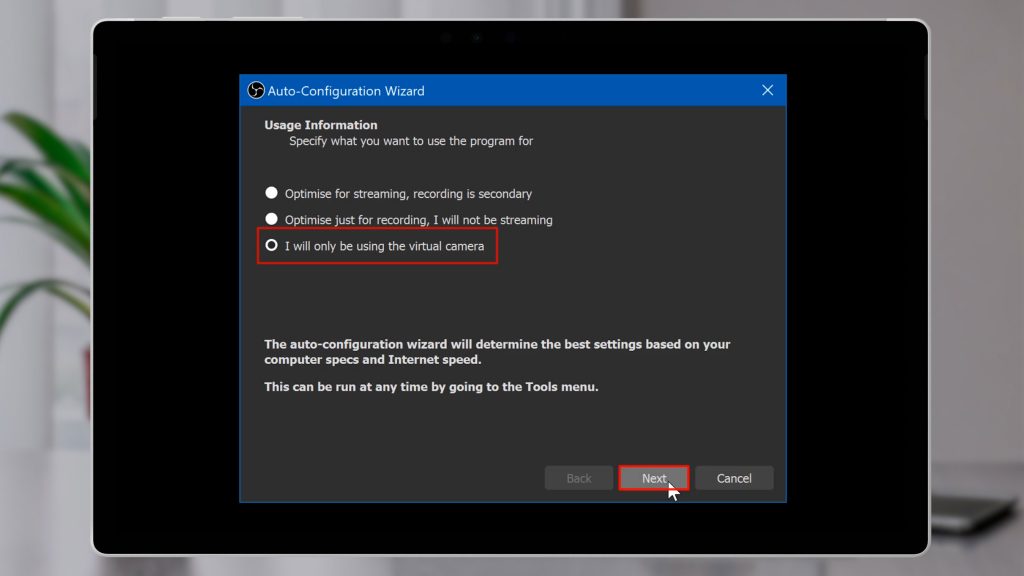
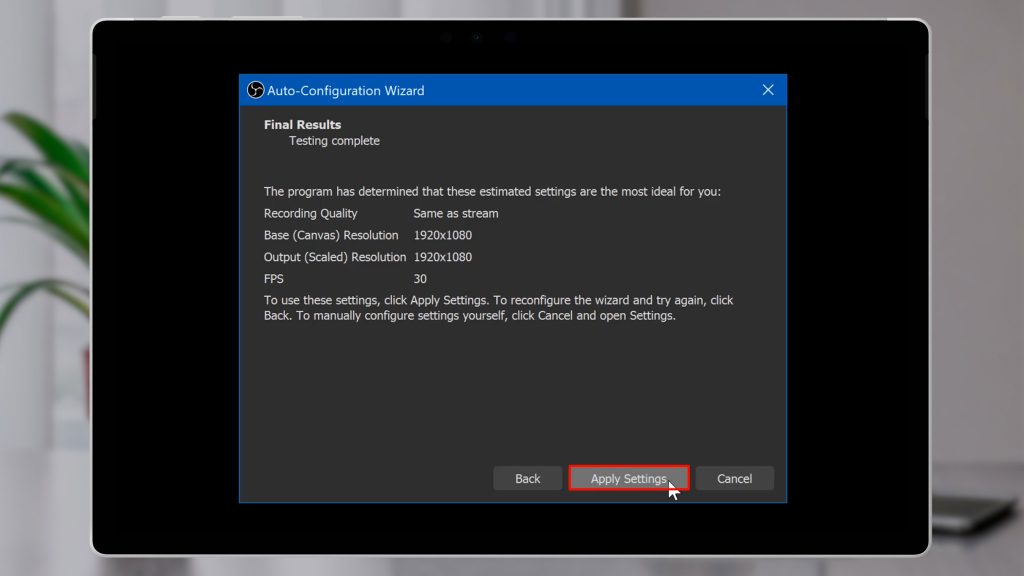
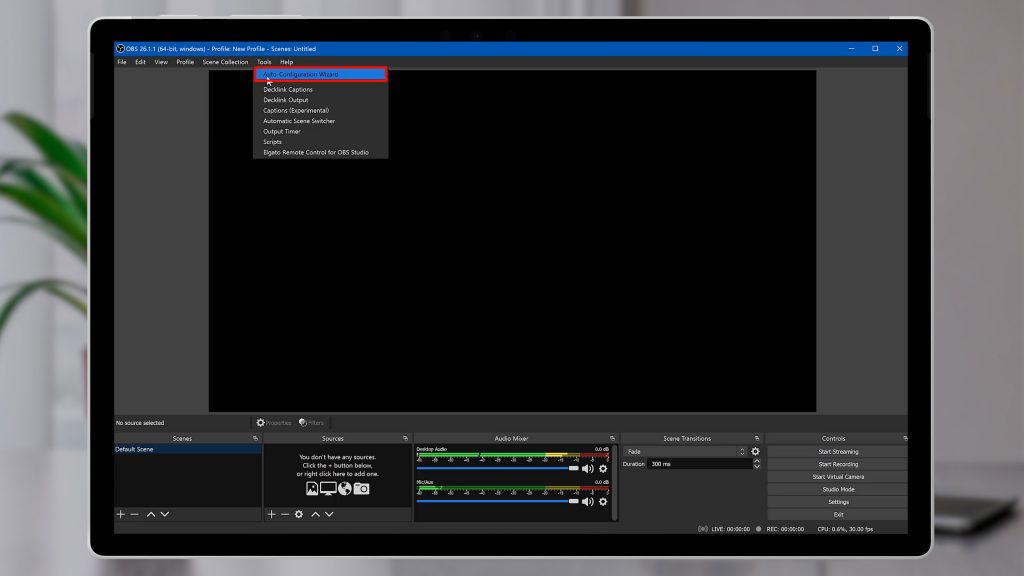
Once you’ve downloaded OBS Studio and run it the first time, it will ask you about your intentions. OBS is often used for live streaming and for recording content, but in our example we want to use the Virtual Camera in Teams or Zoom. So we’ll select this virtual camera option.
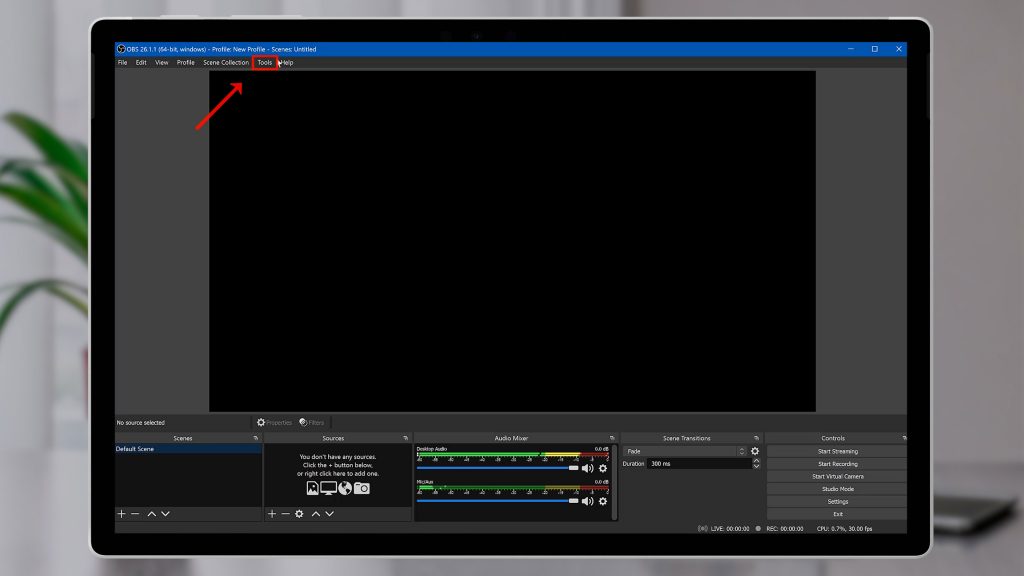
If you already did this and chose another option, don’t worry. You can change it if you need to by clicking on Tools > Auto Configuration Wizard.
Step 2: Scenes
Once we’re in the program, we’ll see a blank window where a preview of our video is going to appear.
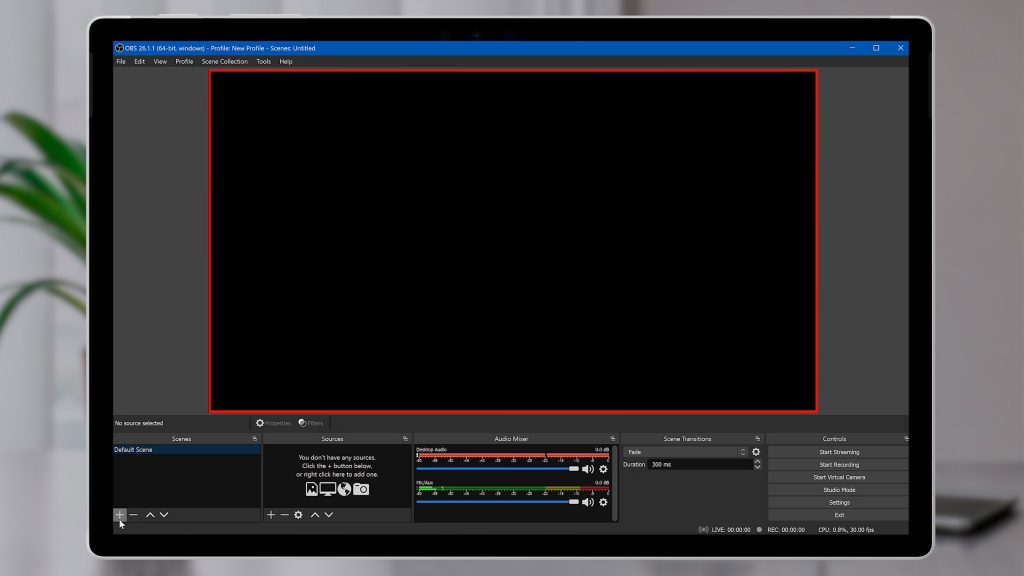
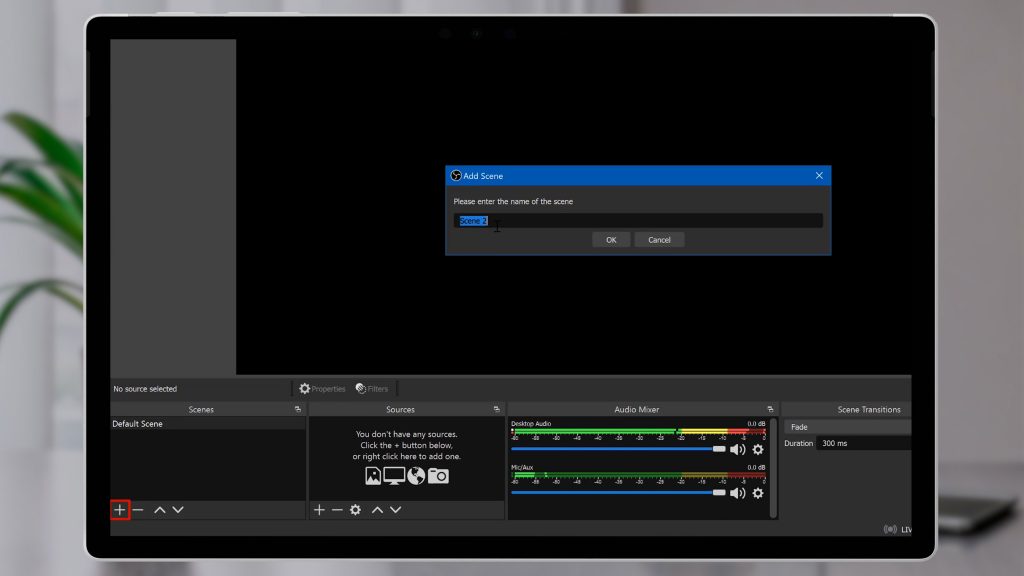
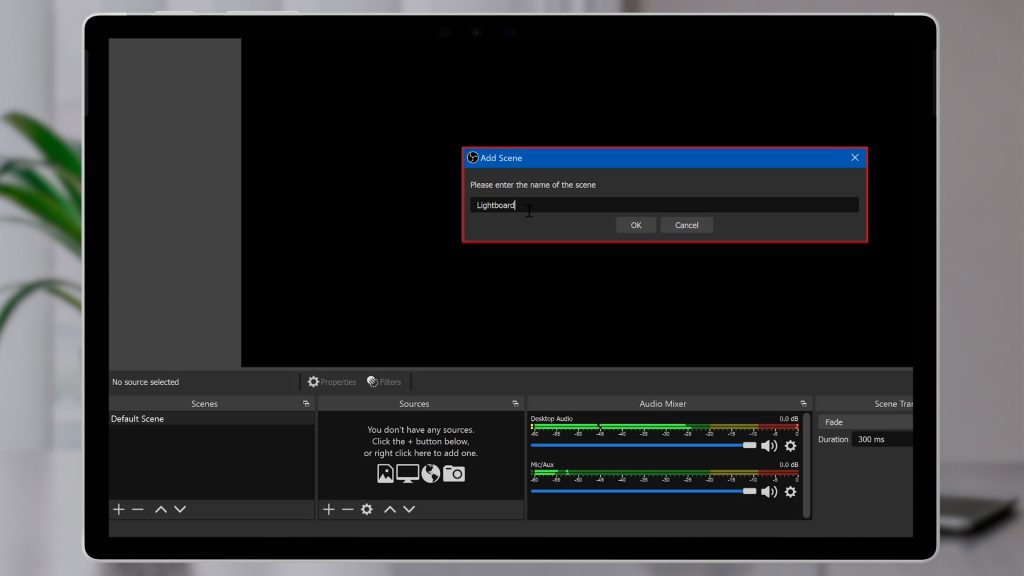
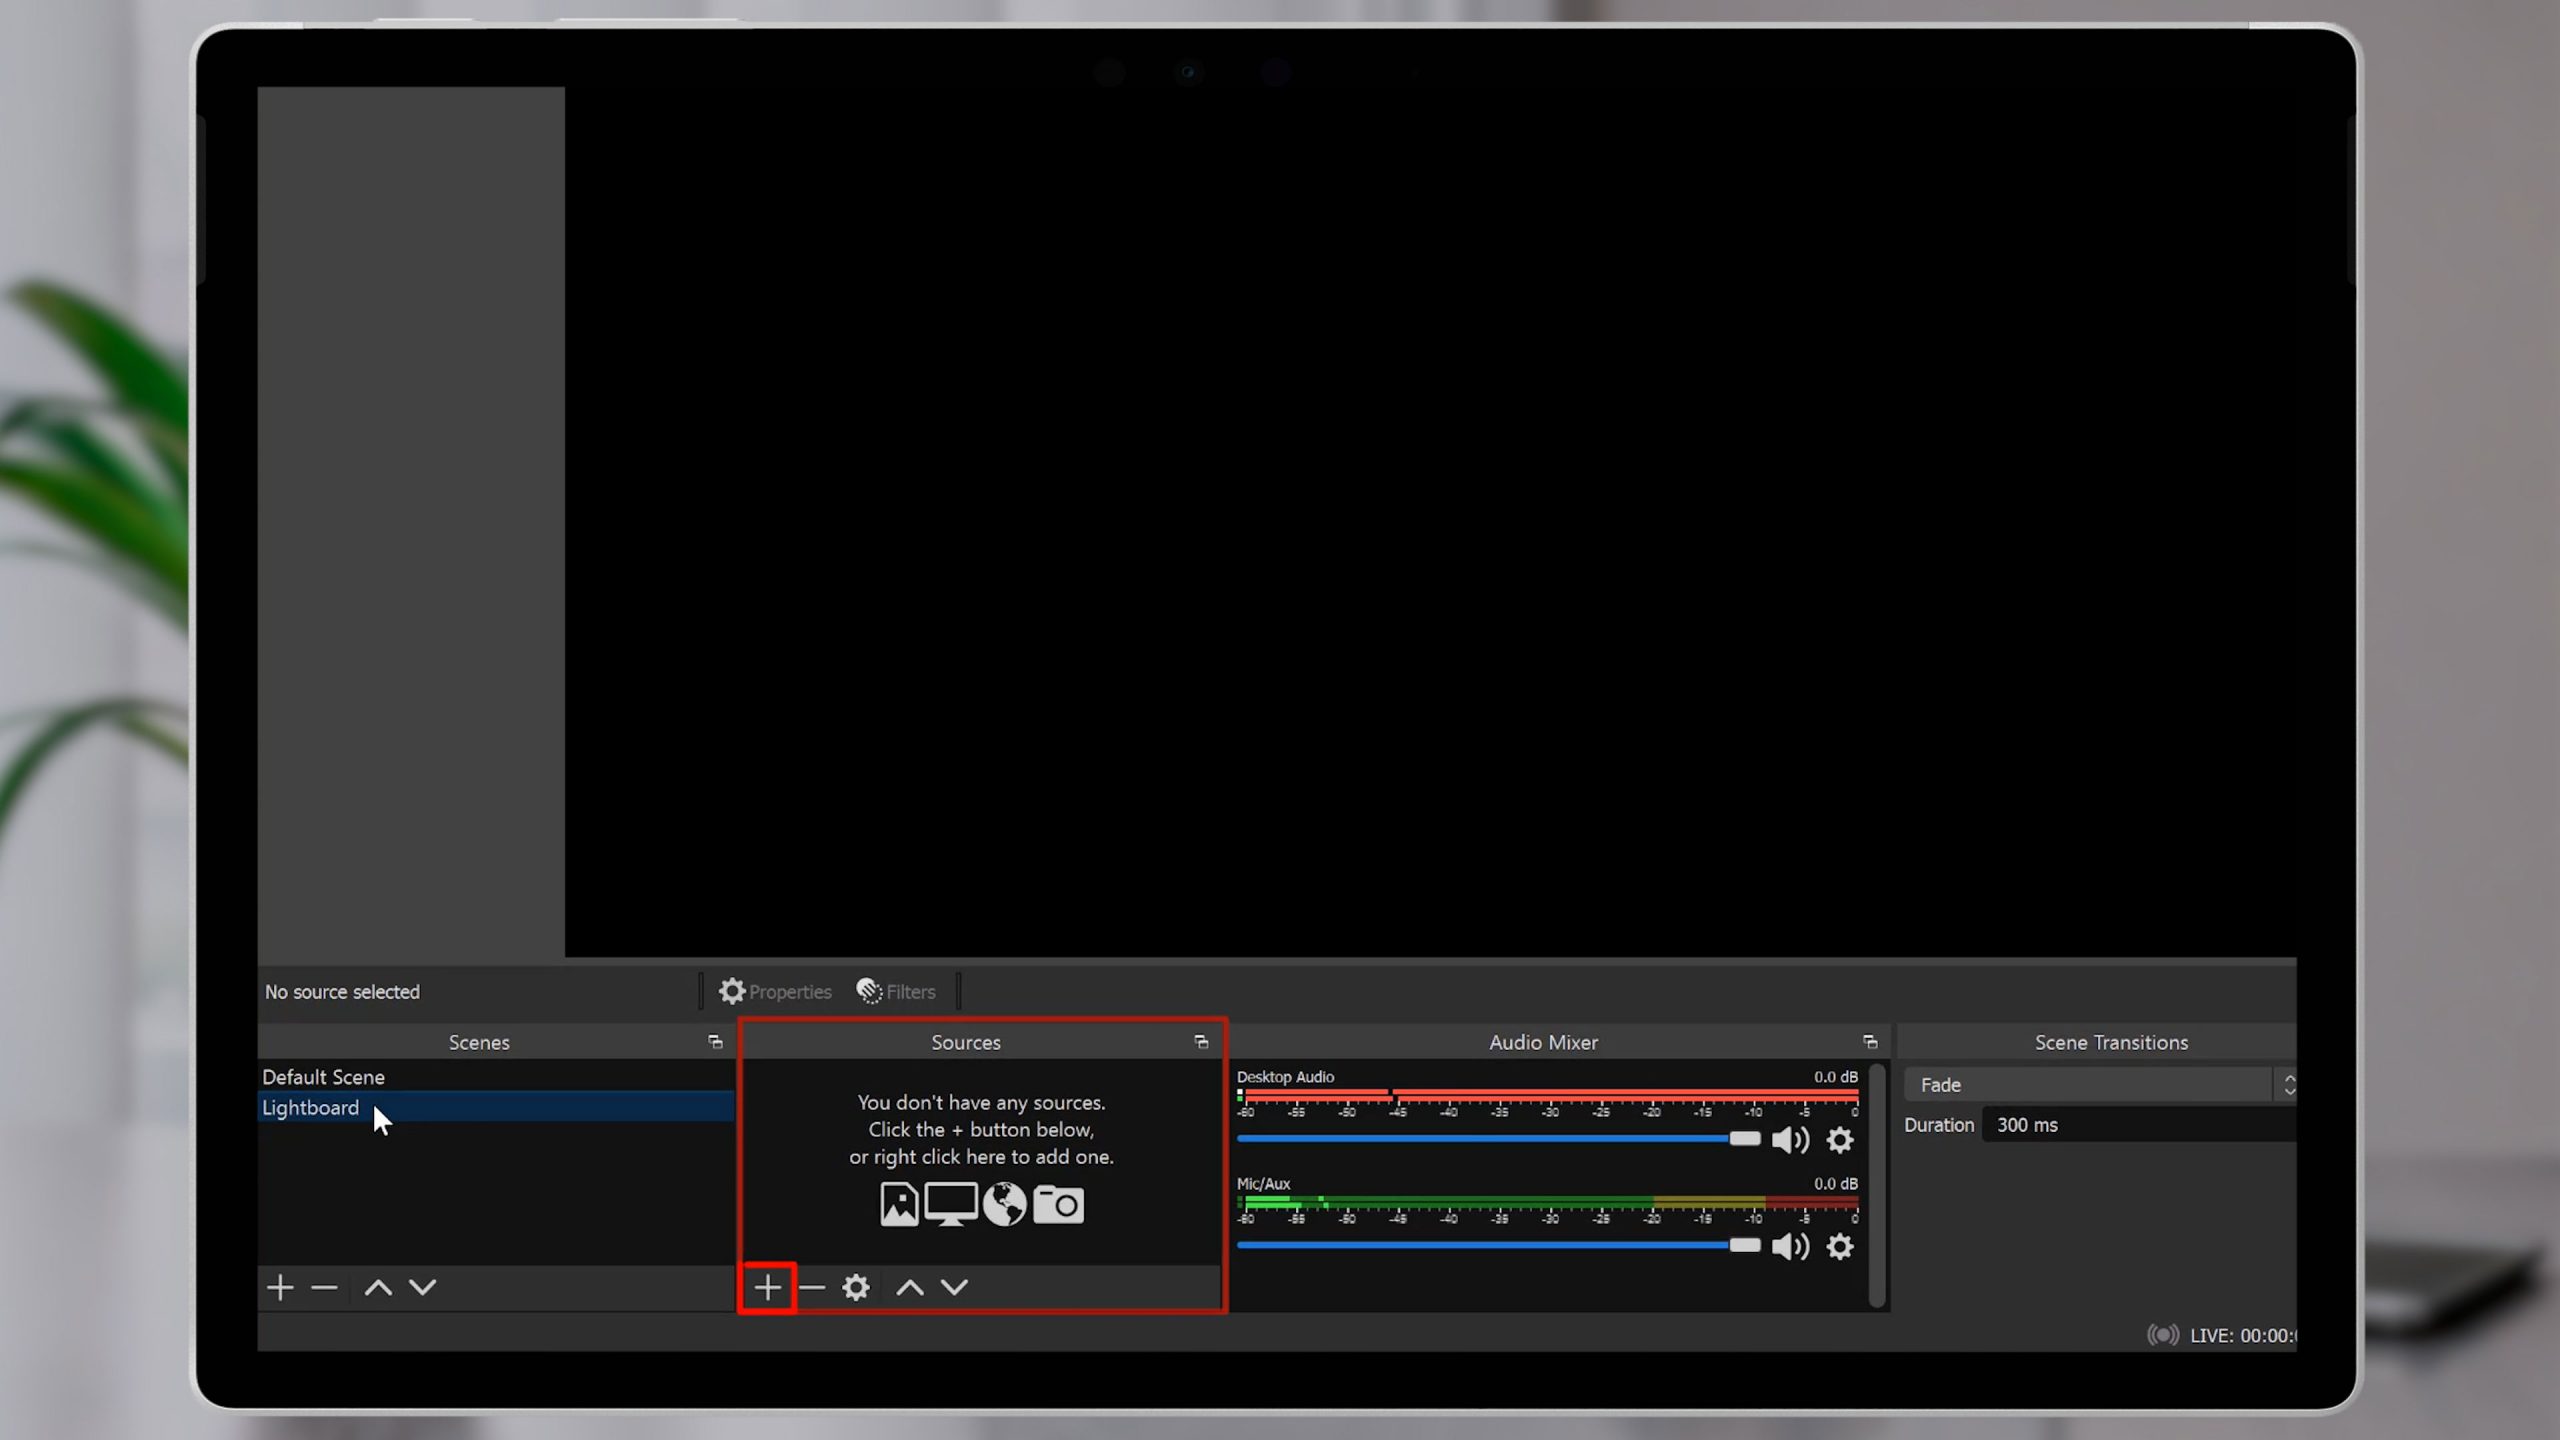
Using the tools at the bottom of the program, we’re going to create a new “Scene” first. Click on this plus icon in the Scenes list. I’m going to call this Scene, “Lightboard”.
Once we have a Scene, we need to put some things into it. You can use Scenes to quickly switch between different combinations of video input. So you could switch to a different camera, or an app, or both together. For the task today, we’ll just stick with the one Scene.
Step 3: Configure Camera
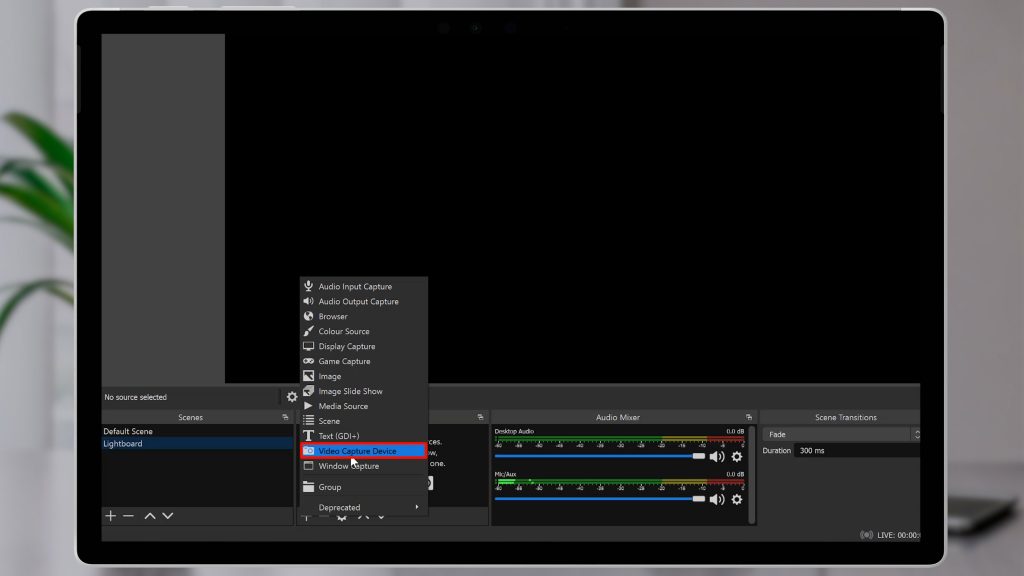
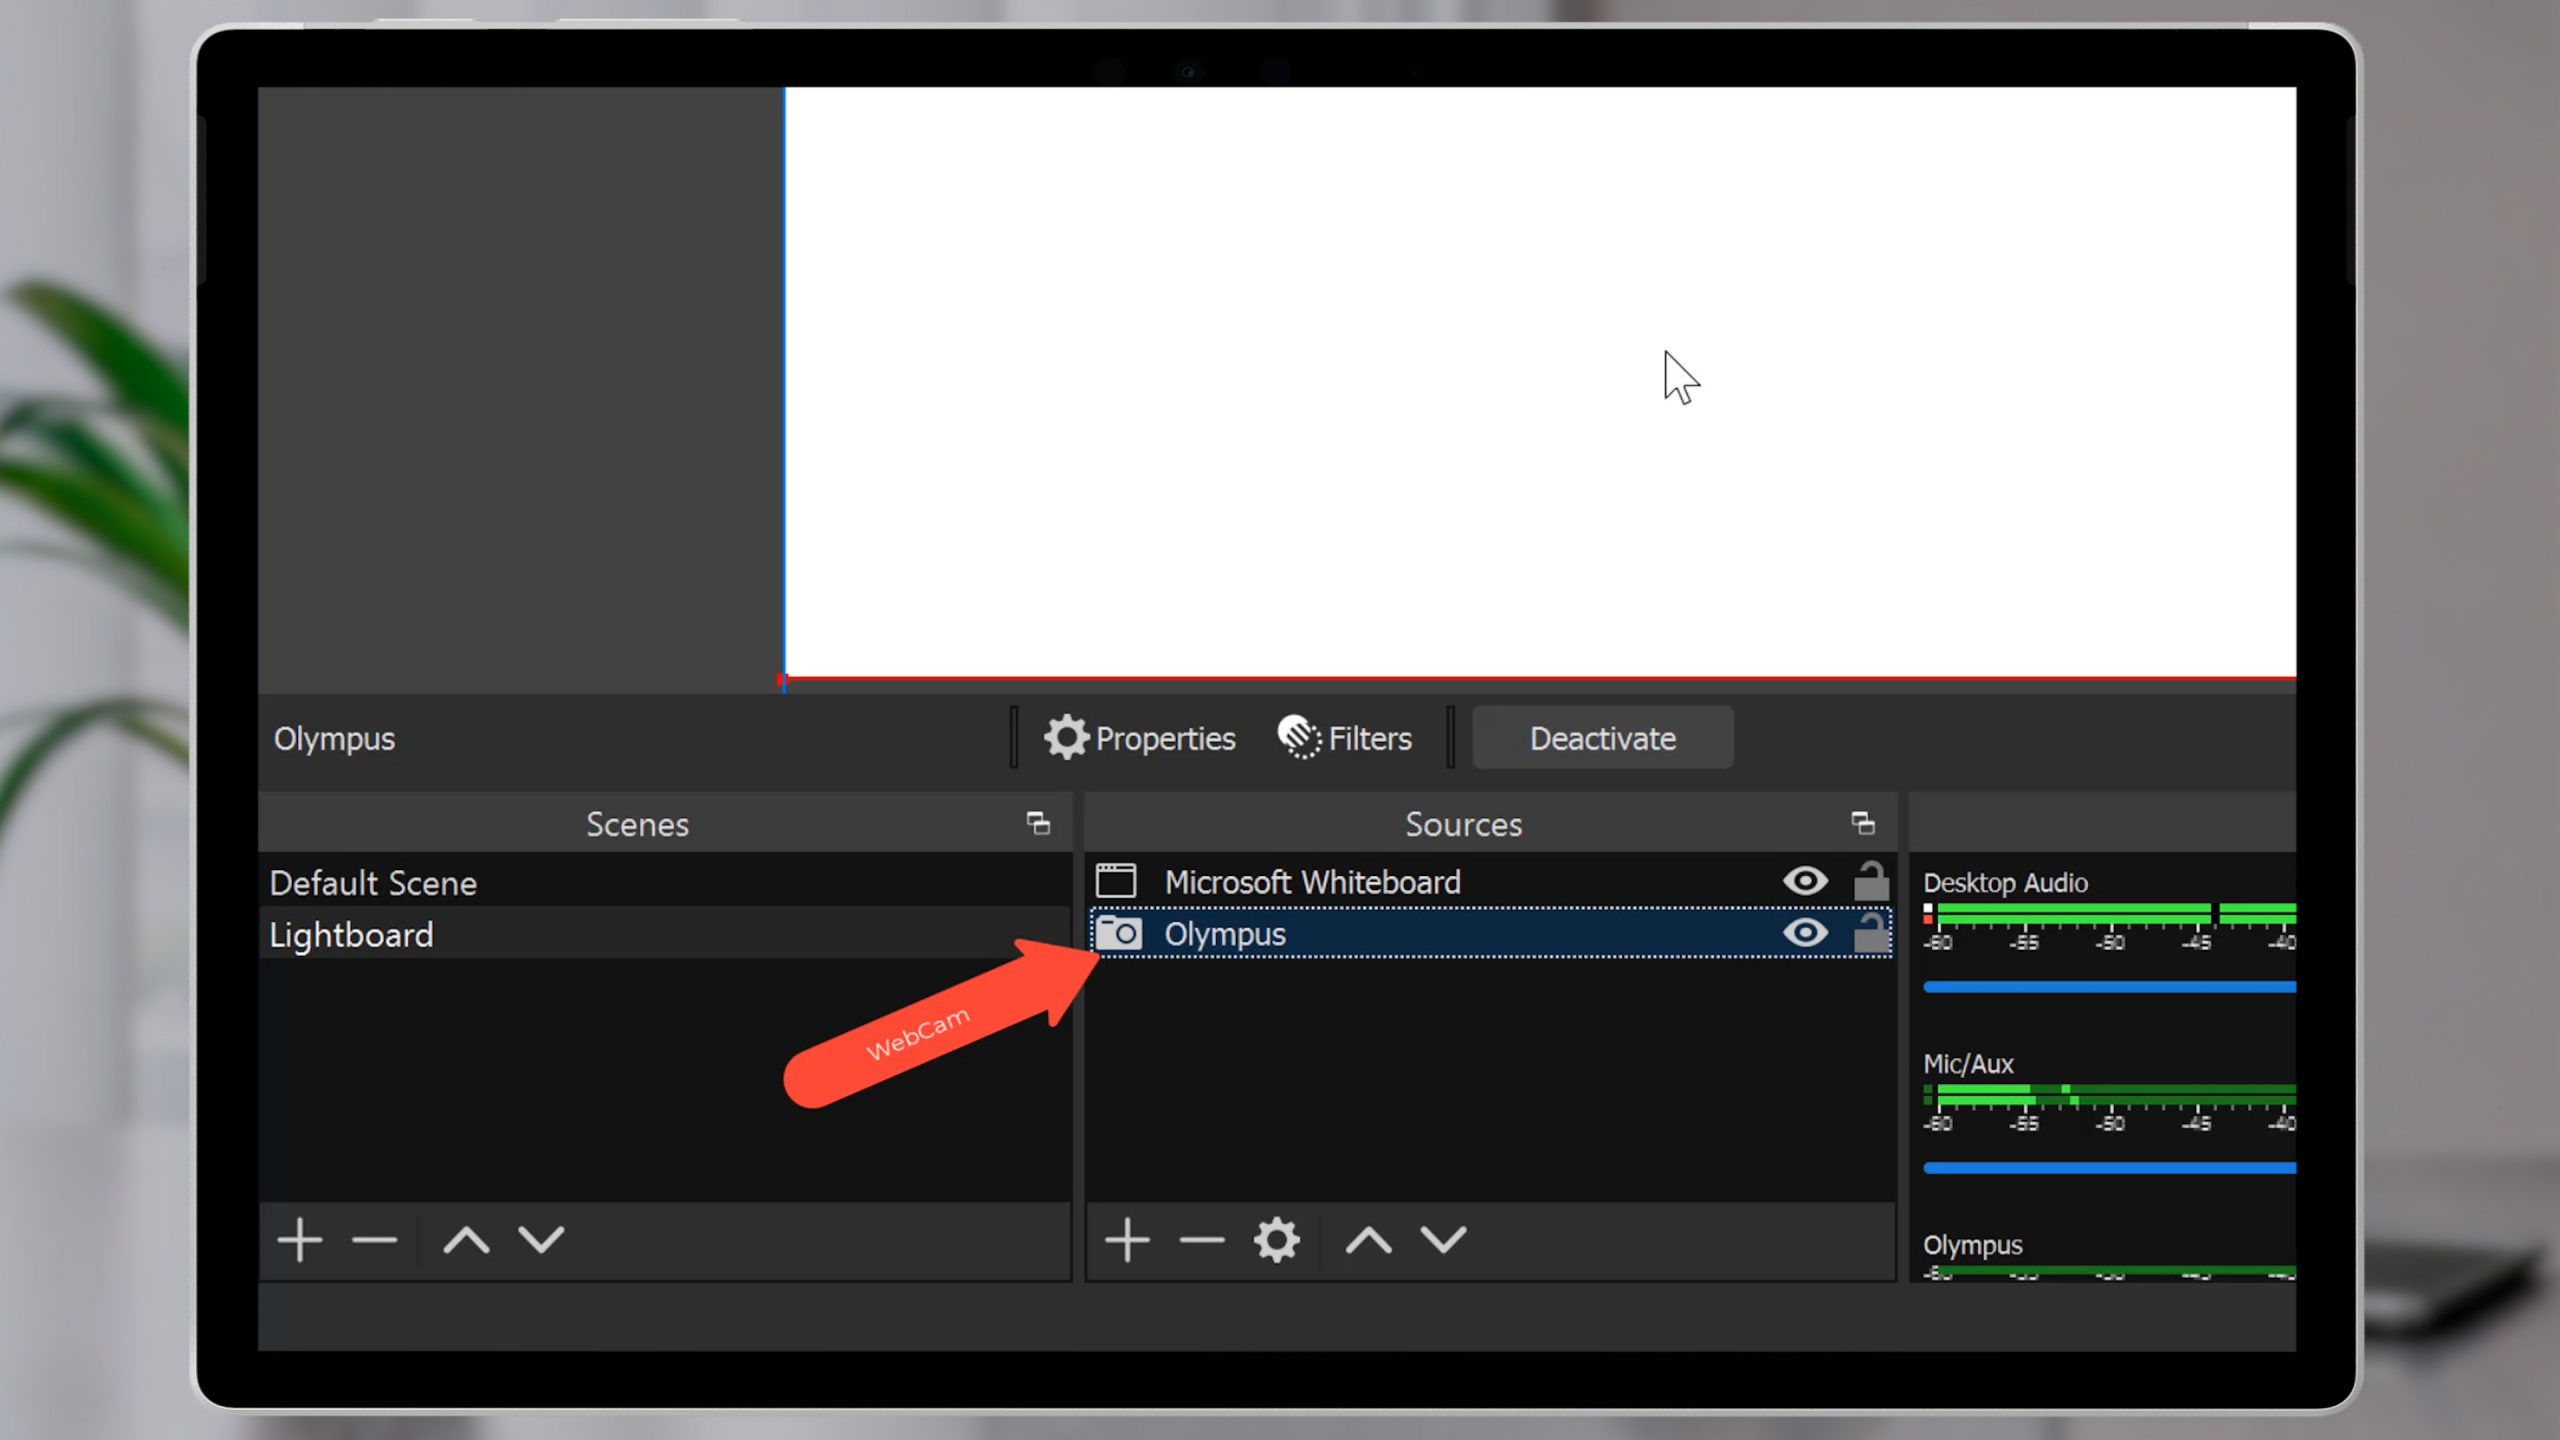
Now, we’ll click on the plus icon in the “Sources” list, and we’ll start by configuring our camera.
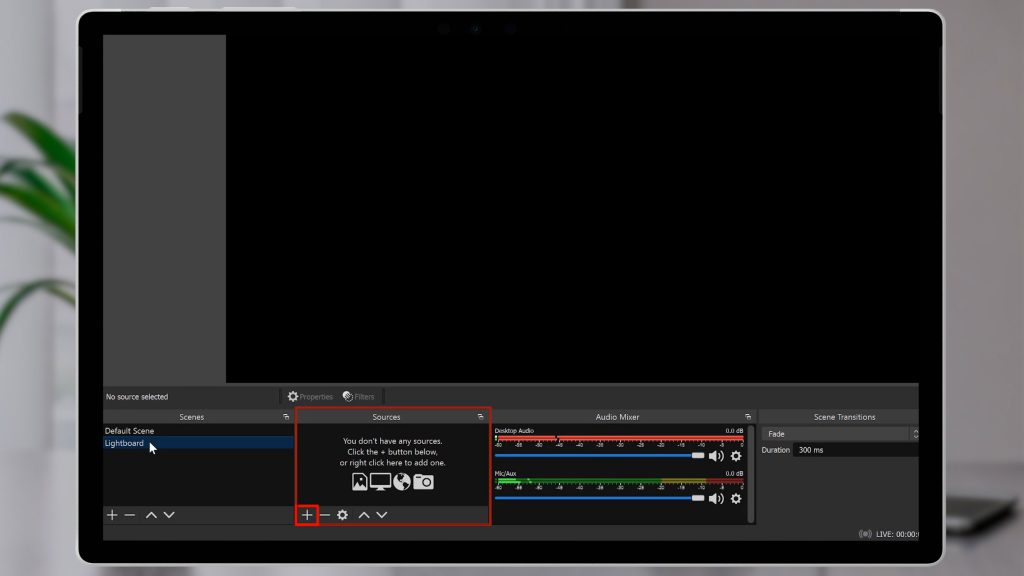
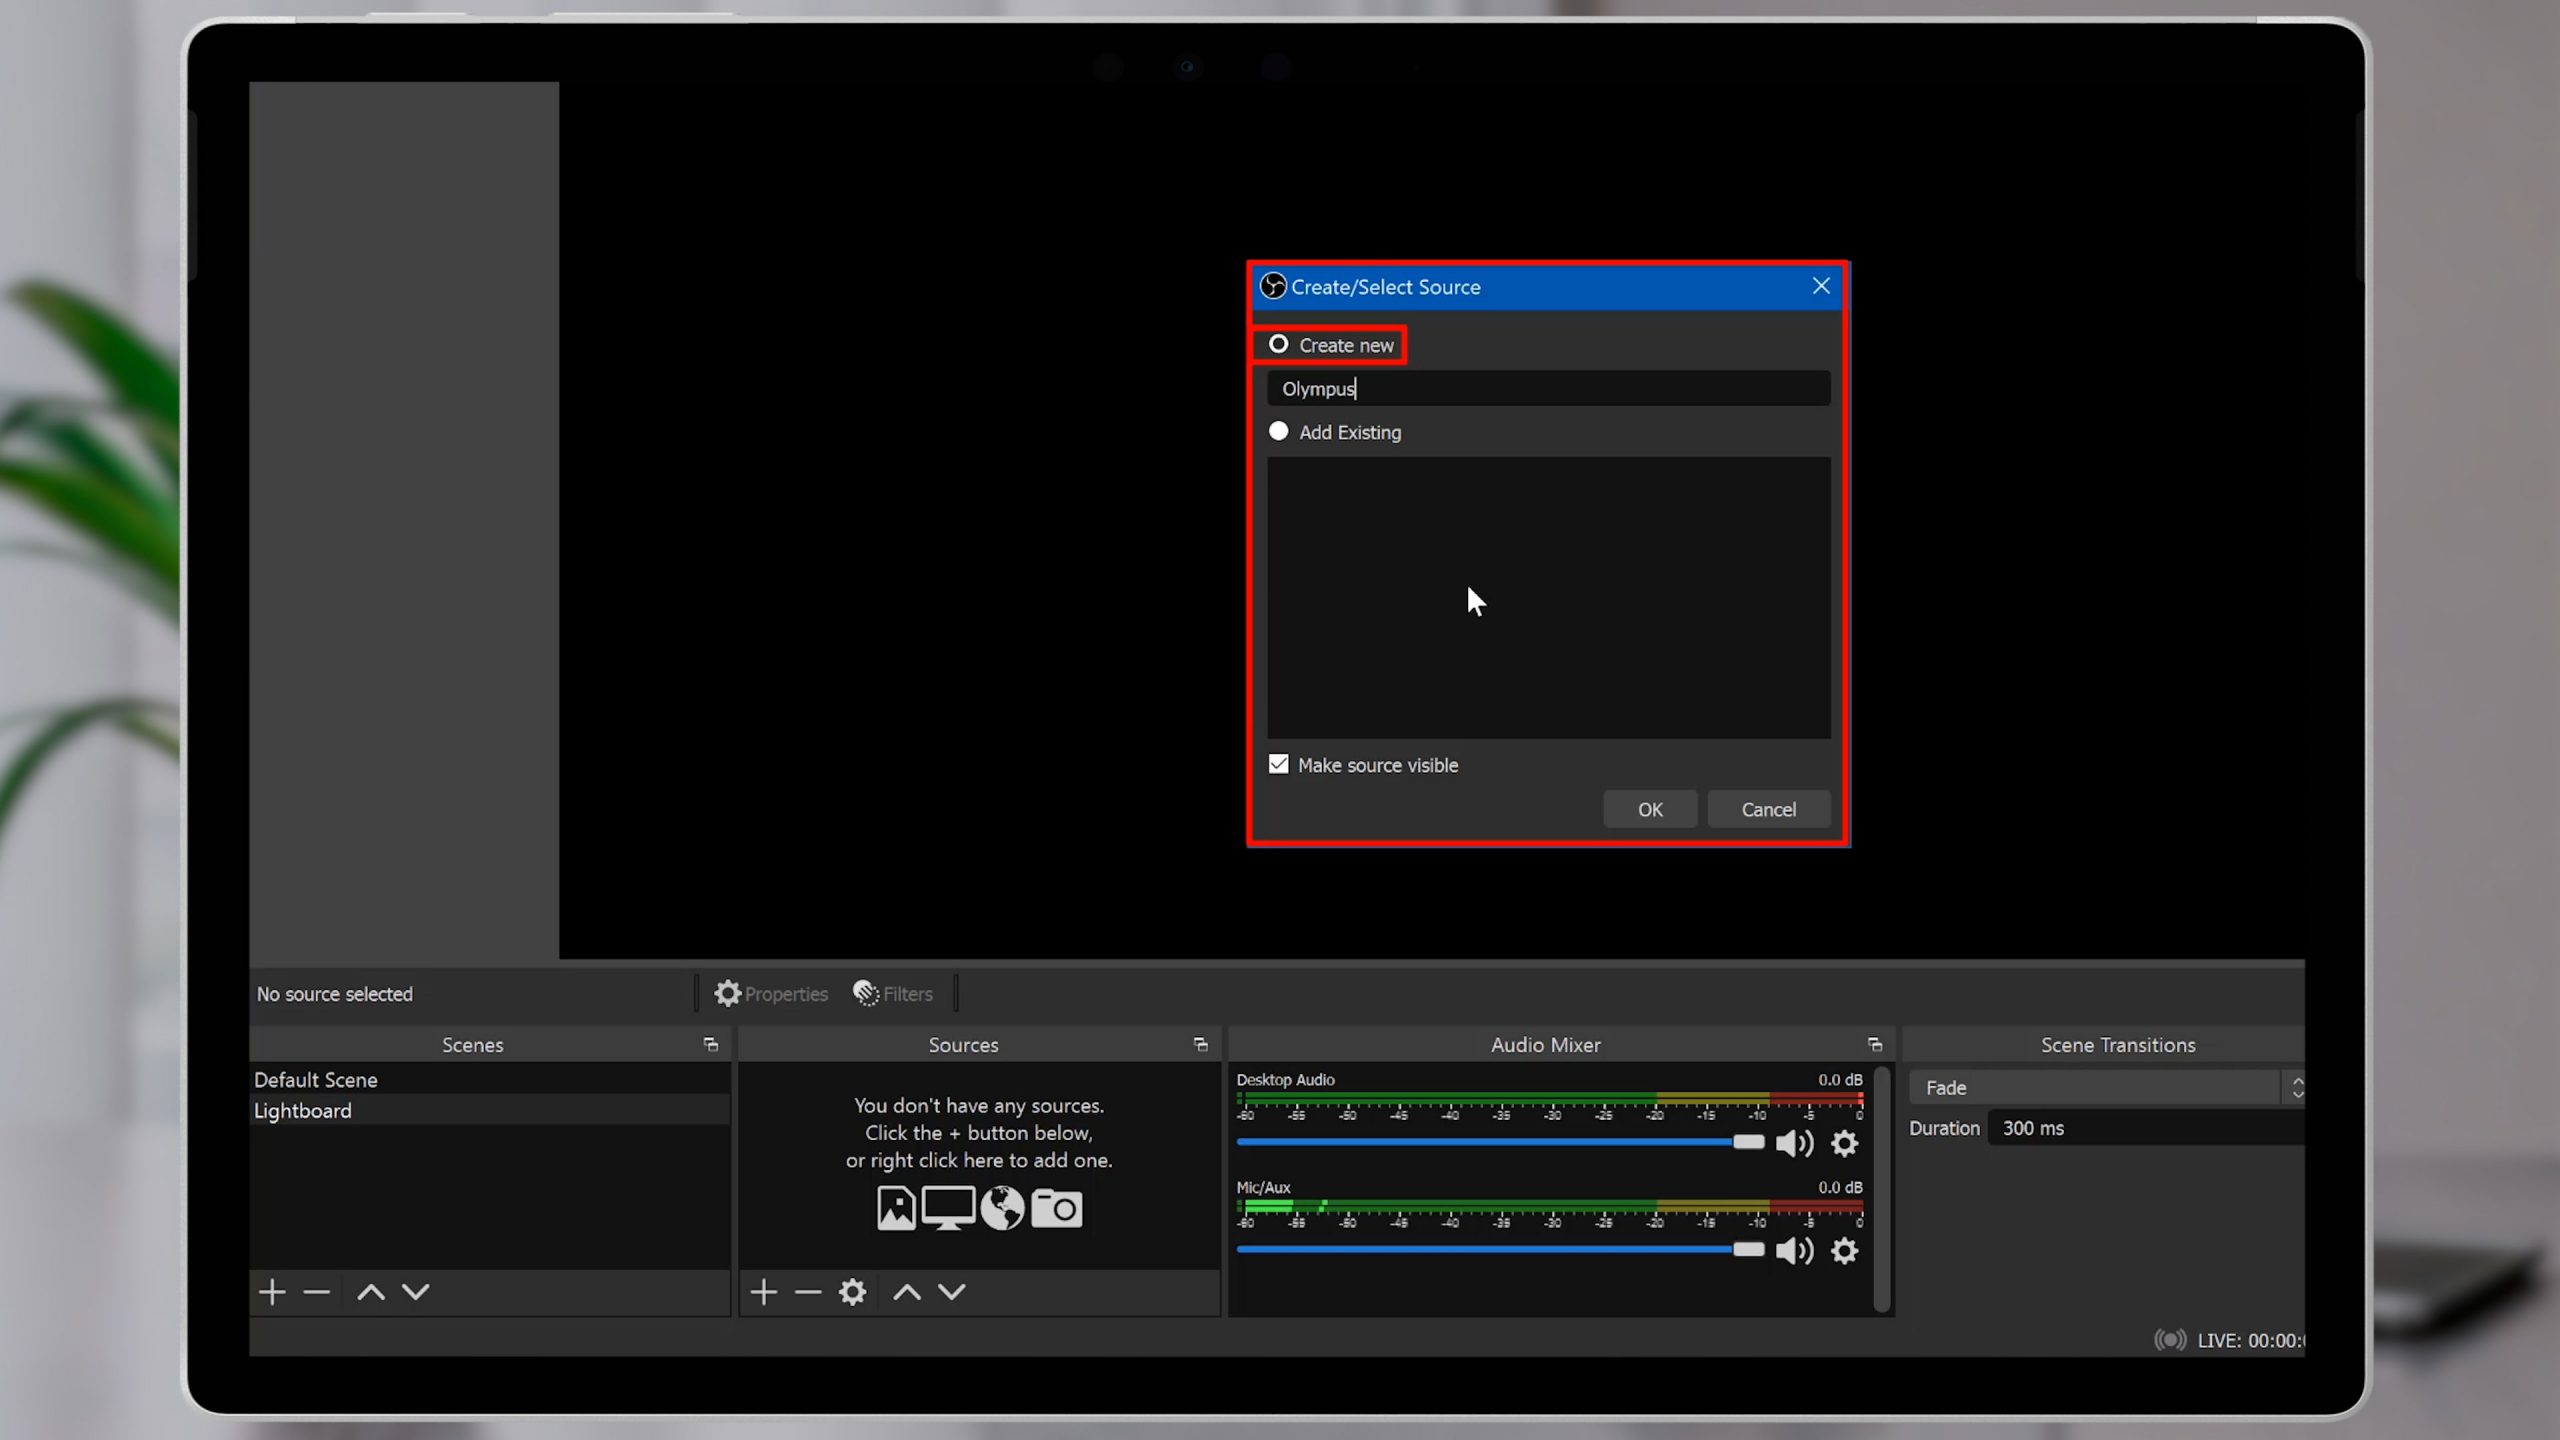
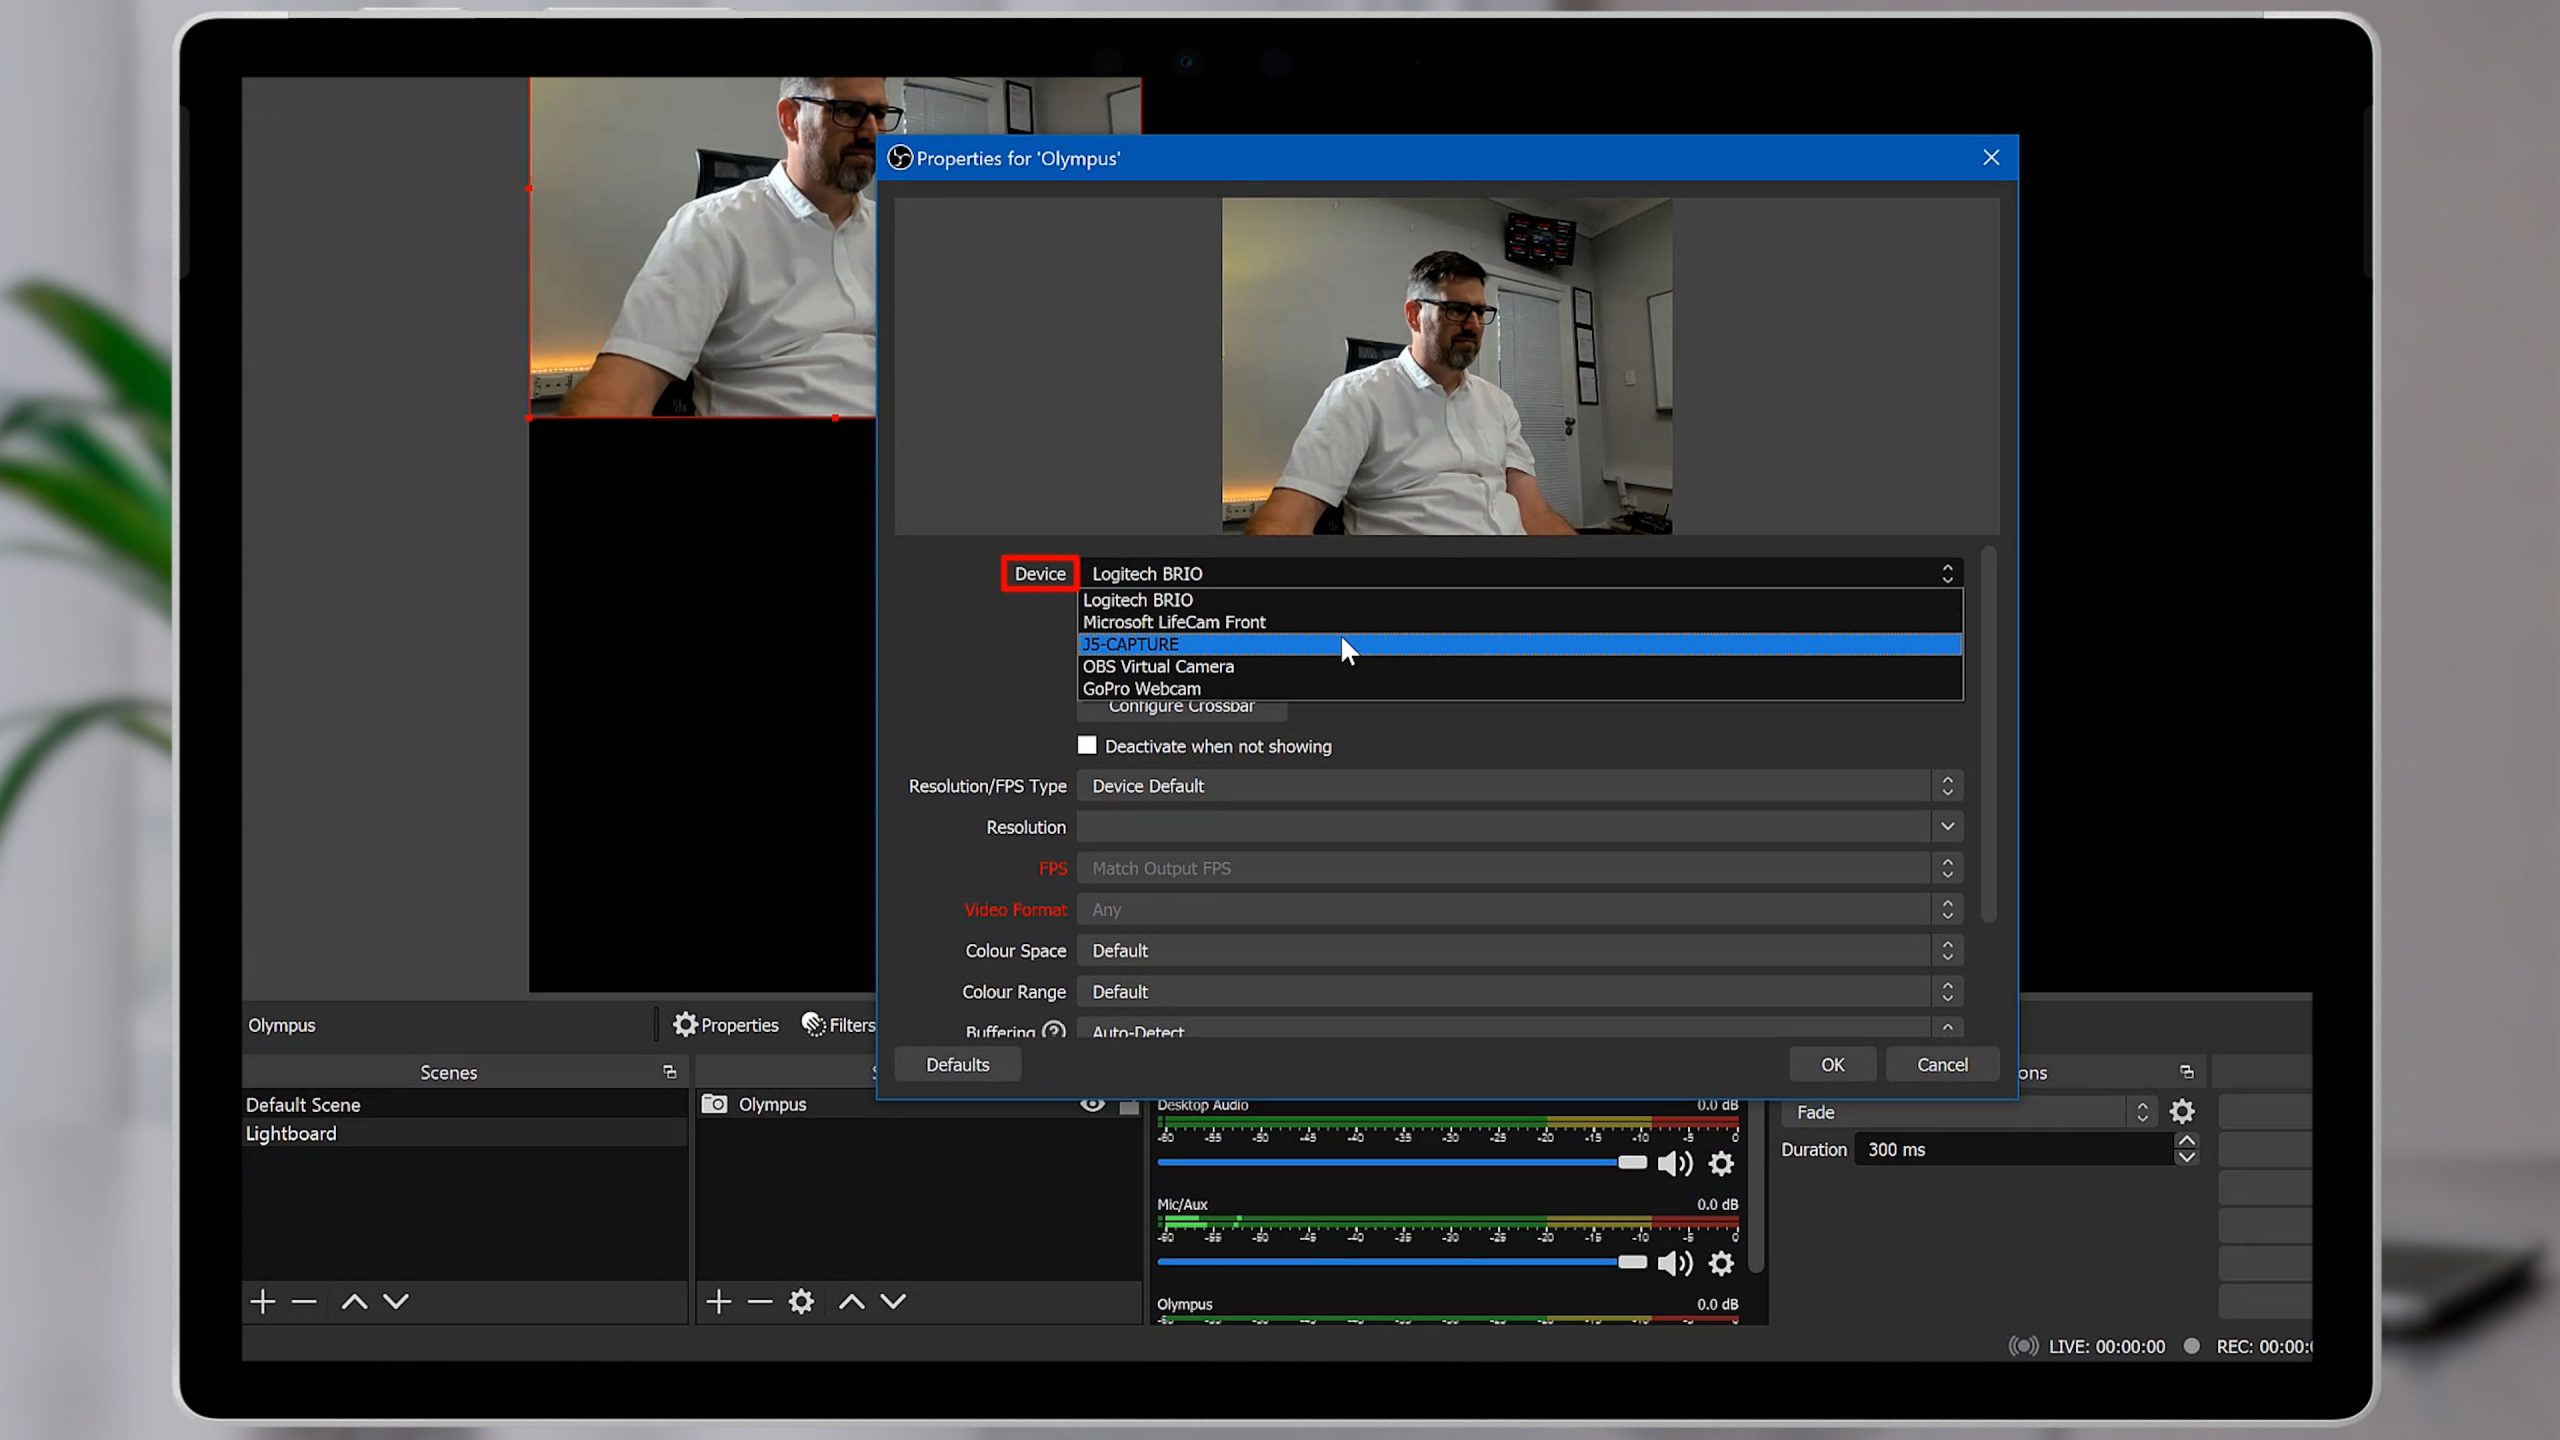
The camera is called a Video Capture Device, so we’ll select that. Use the “Create new” option and type in a name for your camera. This will appear in the Sources list. I’ll call mine “Olympus” – because I’m going to use my Mirrorless camera as a webcam. I’ll use a capture card for this demo, because it looks best.
If you have an external webcam plugged in and ready, you’ll select that from the list here and name it appropriately. Or, go ahead and use the inbuilt camera if that’s all you have.
Step 4: Run Microsoft Whiteboard
Now we’ll add our Microsoft Whiteboard program. So we’ll need to have that running first. If you don’t have the Whiteboard app, you should get it from the Microsoft Store. Once I have that running, I’ll switch back to OBS.
Step 5: Stream Whiteboard
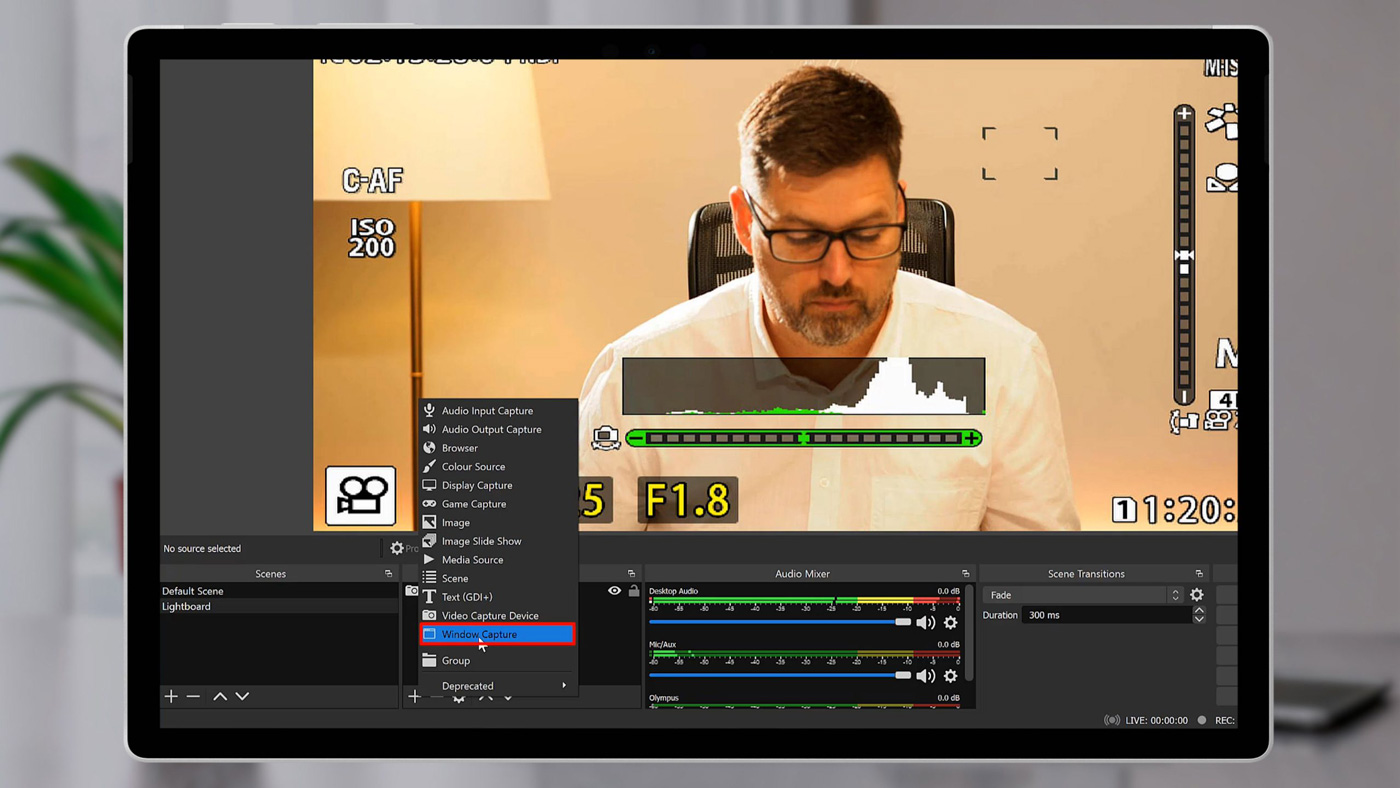
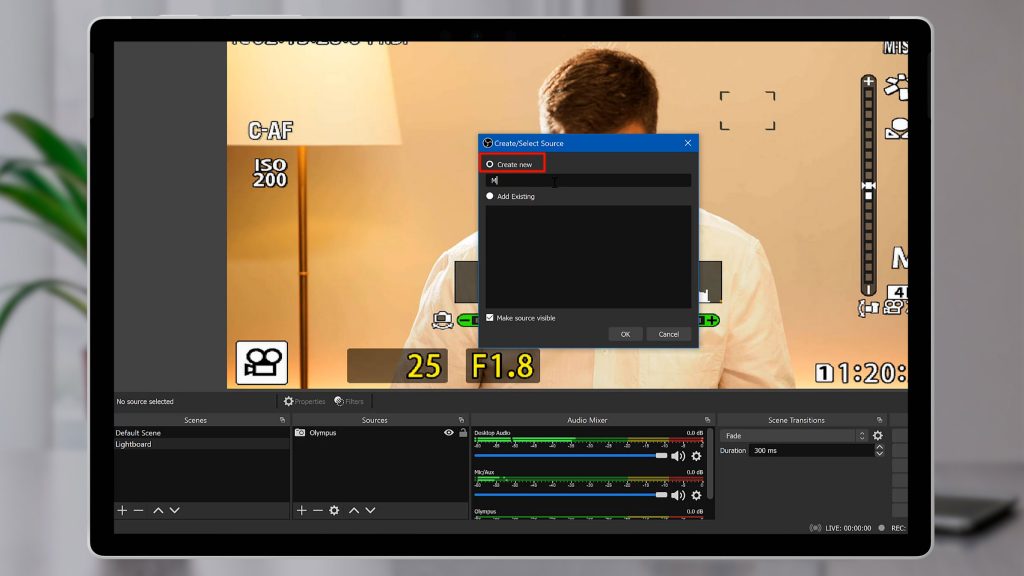
Click the plus icon under “Sources” again, and we will select “Window Capture”. This option allows you to stream any open window from your computer into your video feed.
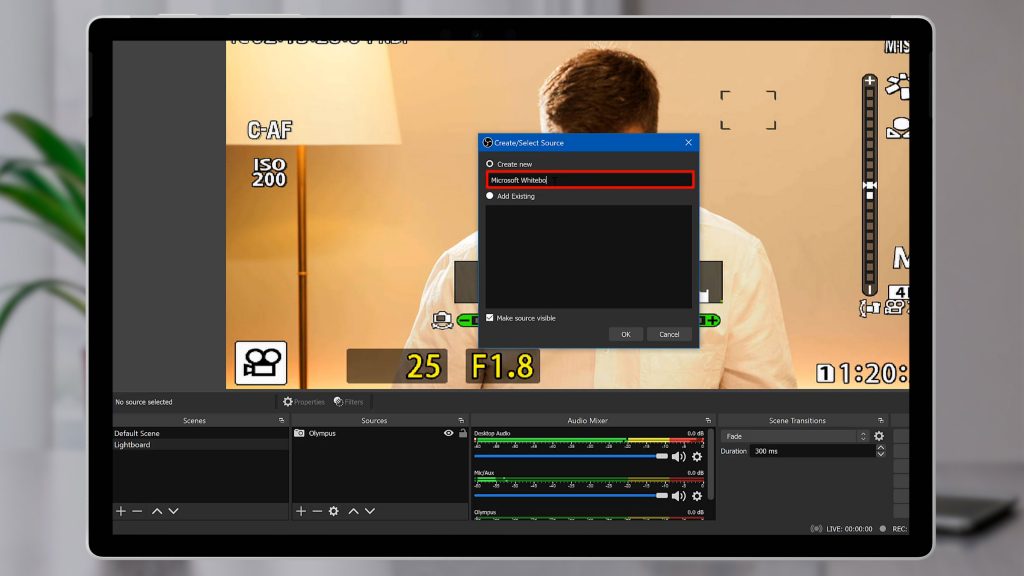
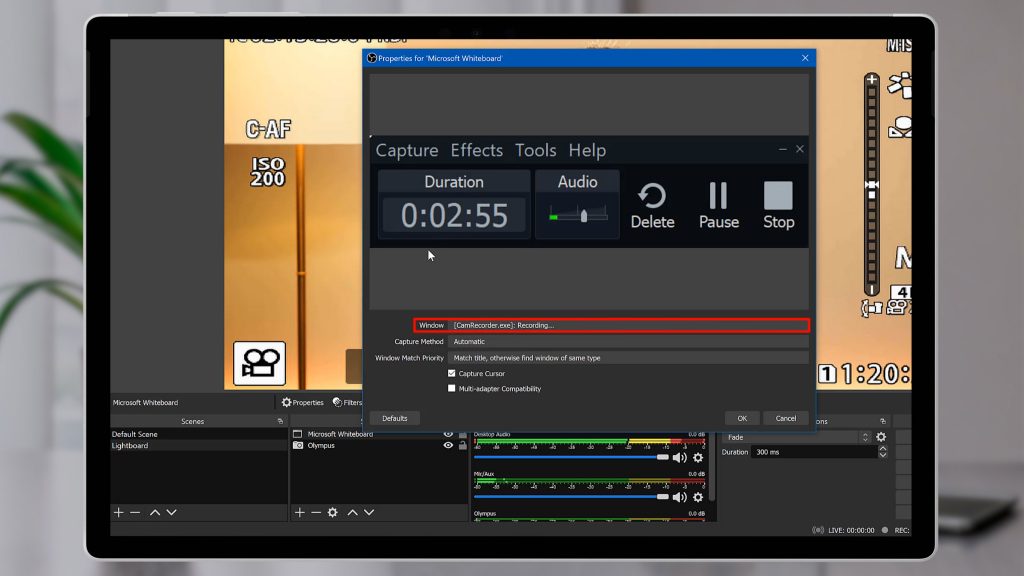
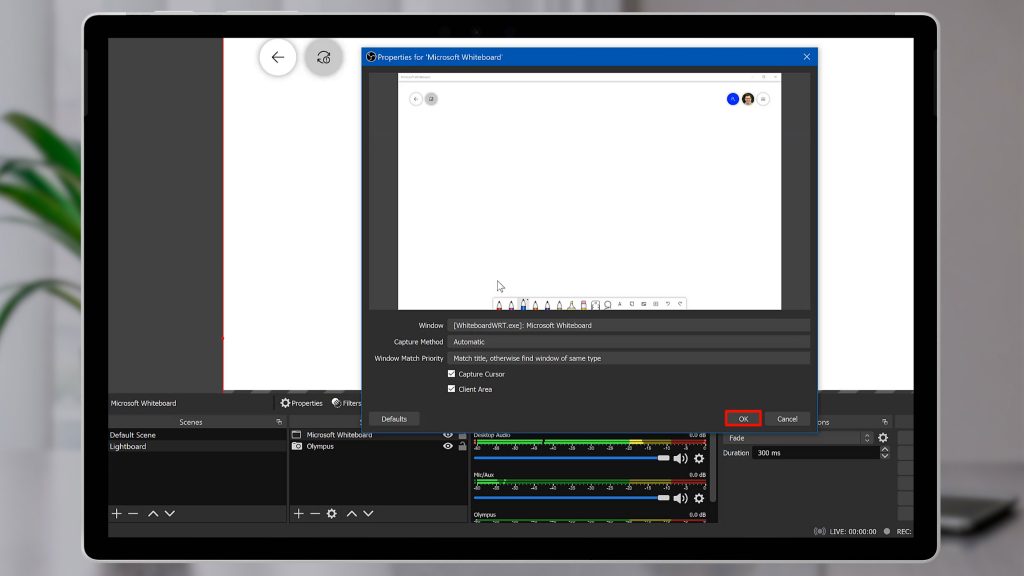
Choose the “Create new” option and type in “Microsoft Whiteboard” for the name. Press ok. You’ll see a list of all of the programs that you have running on the next screen. Select “Microsoft Whiteboard” from the list, and press ok.
Step 6: Resize OBS Sources
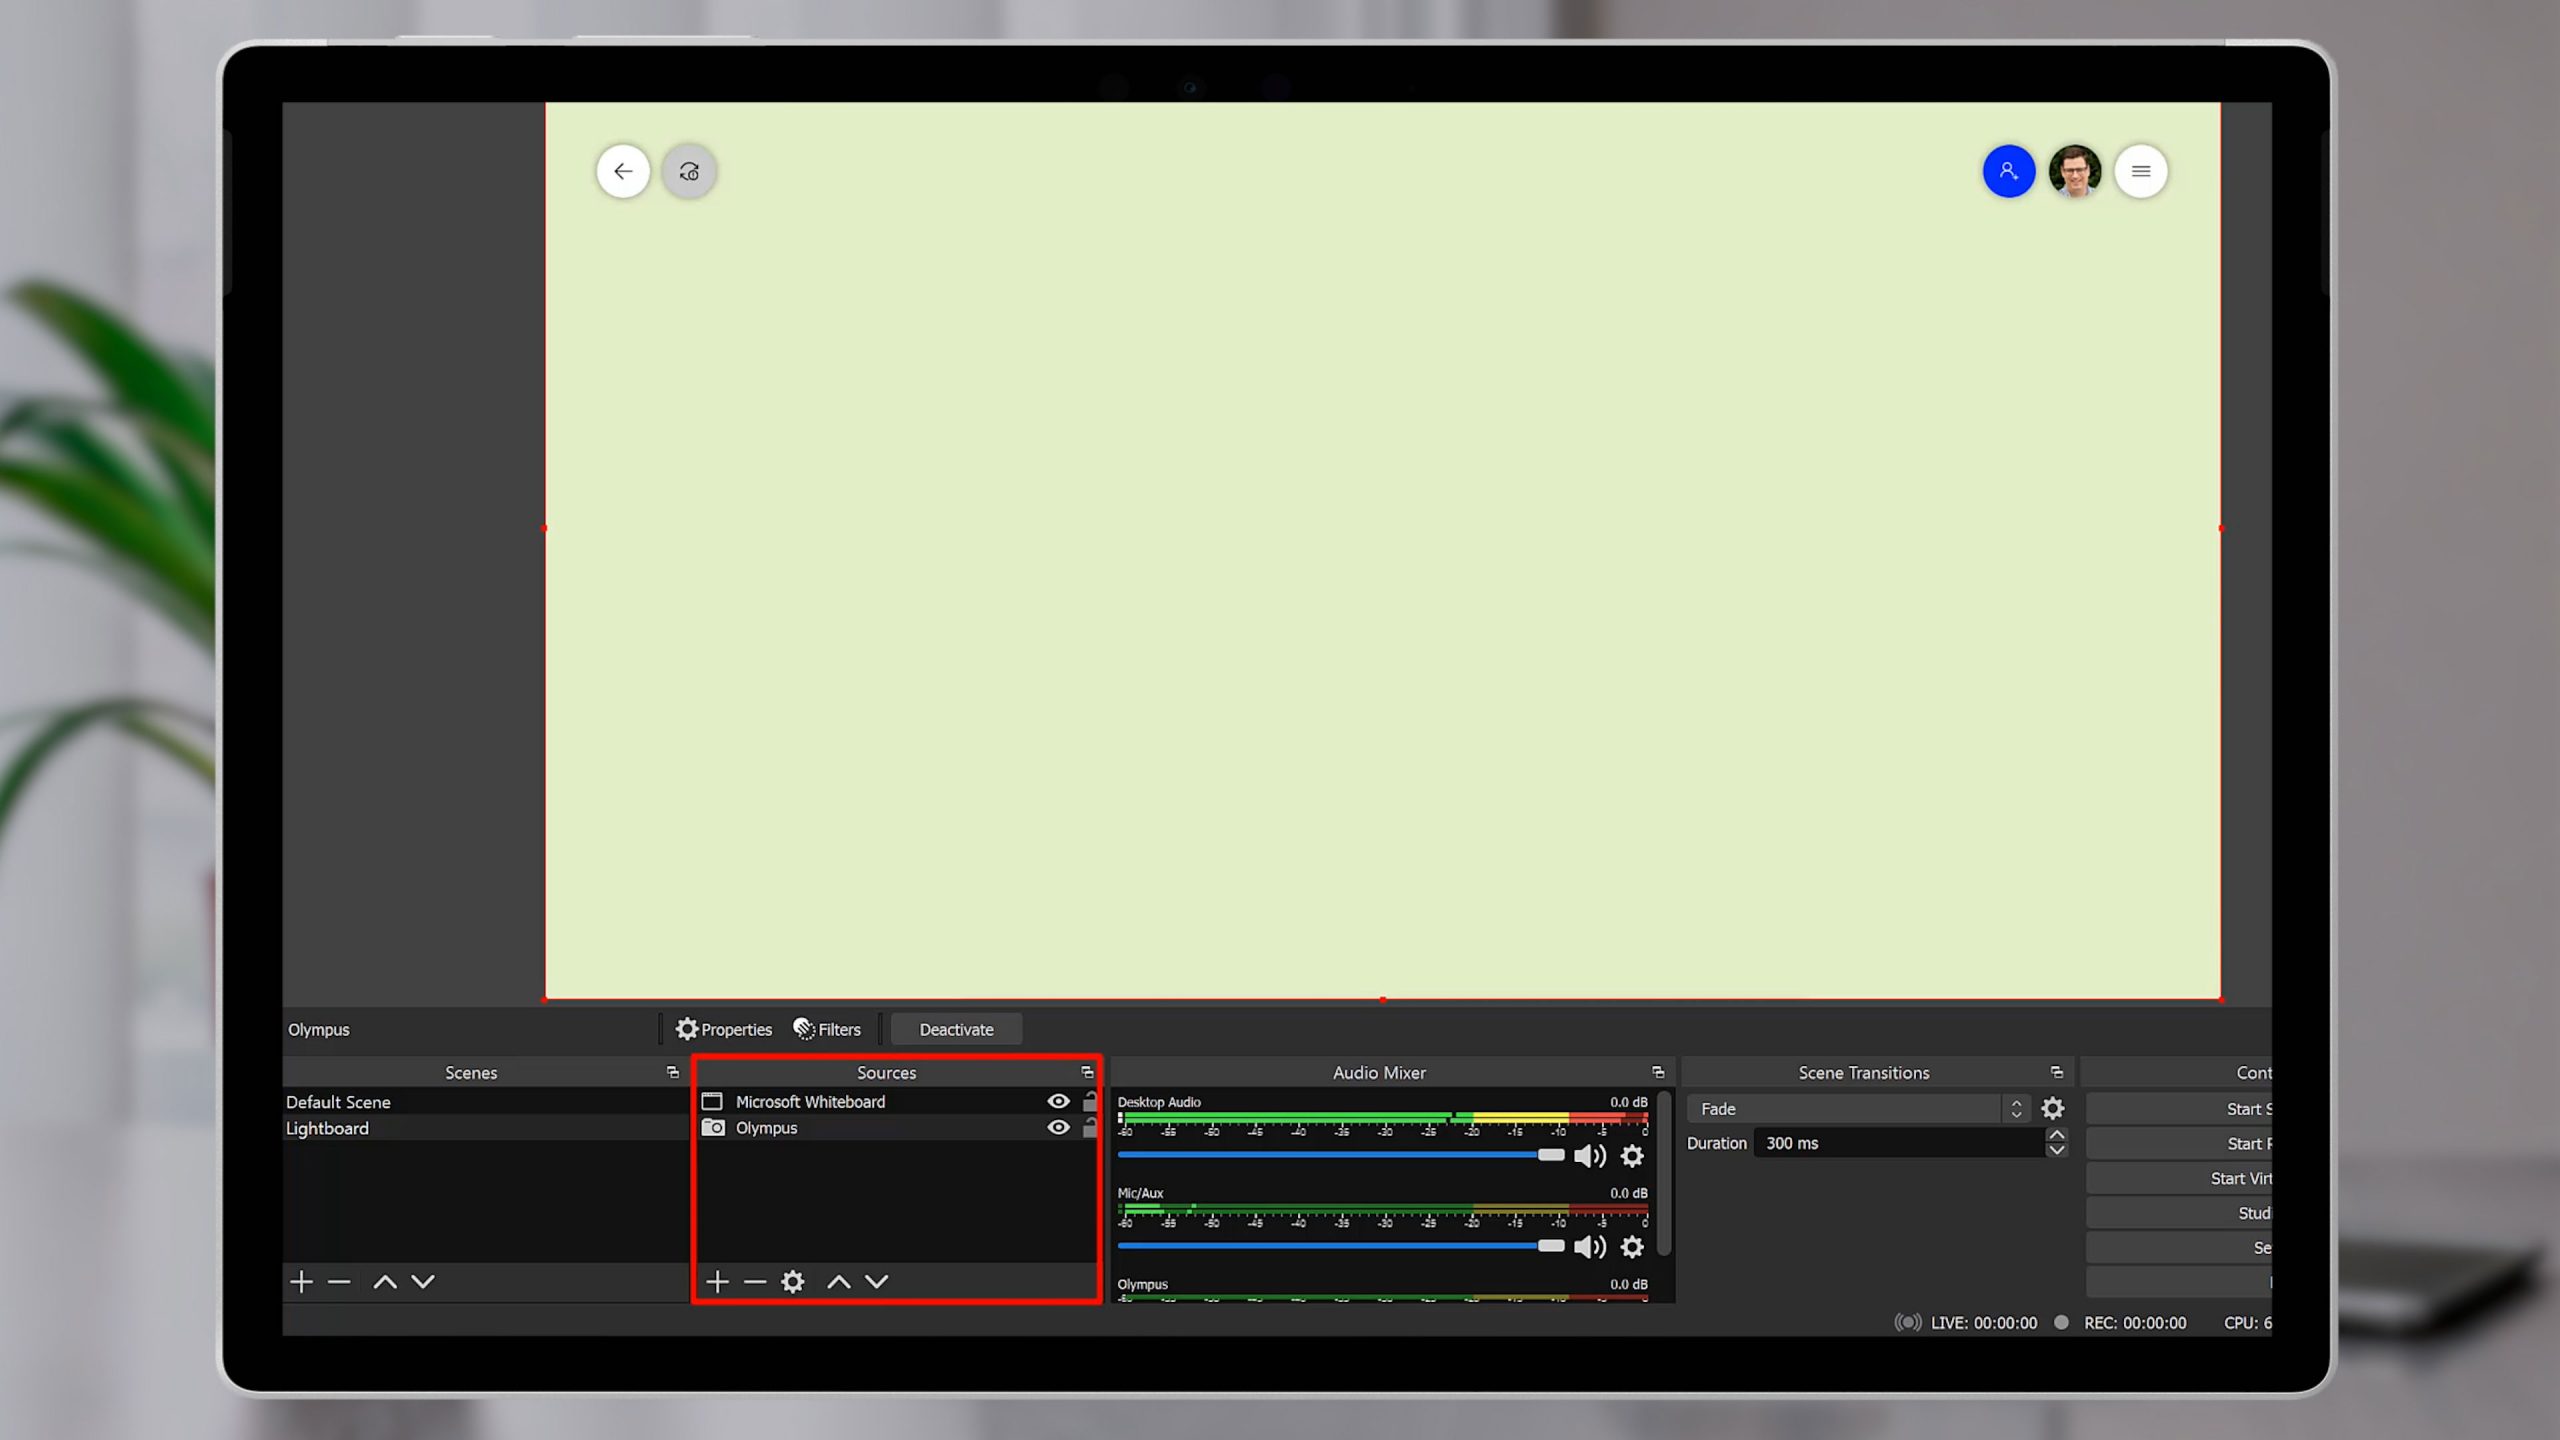
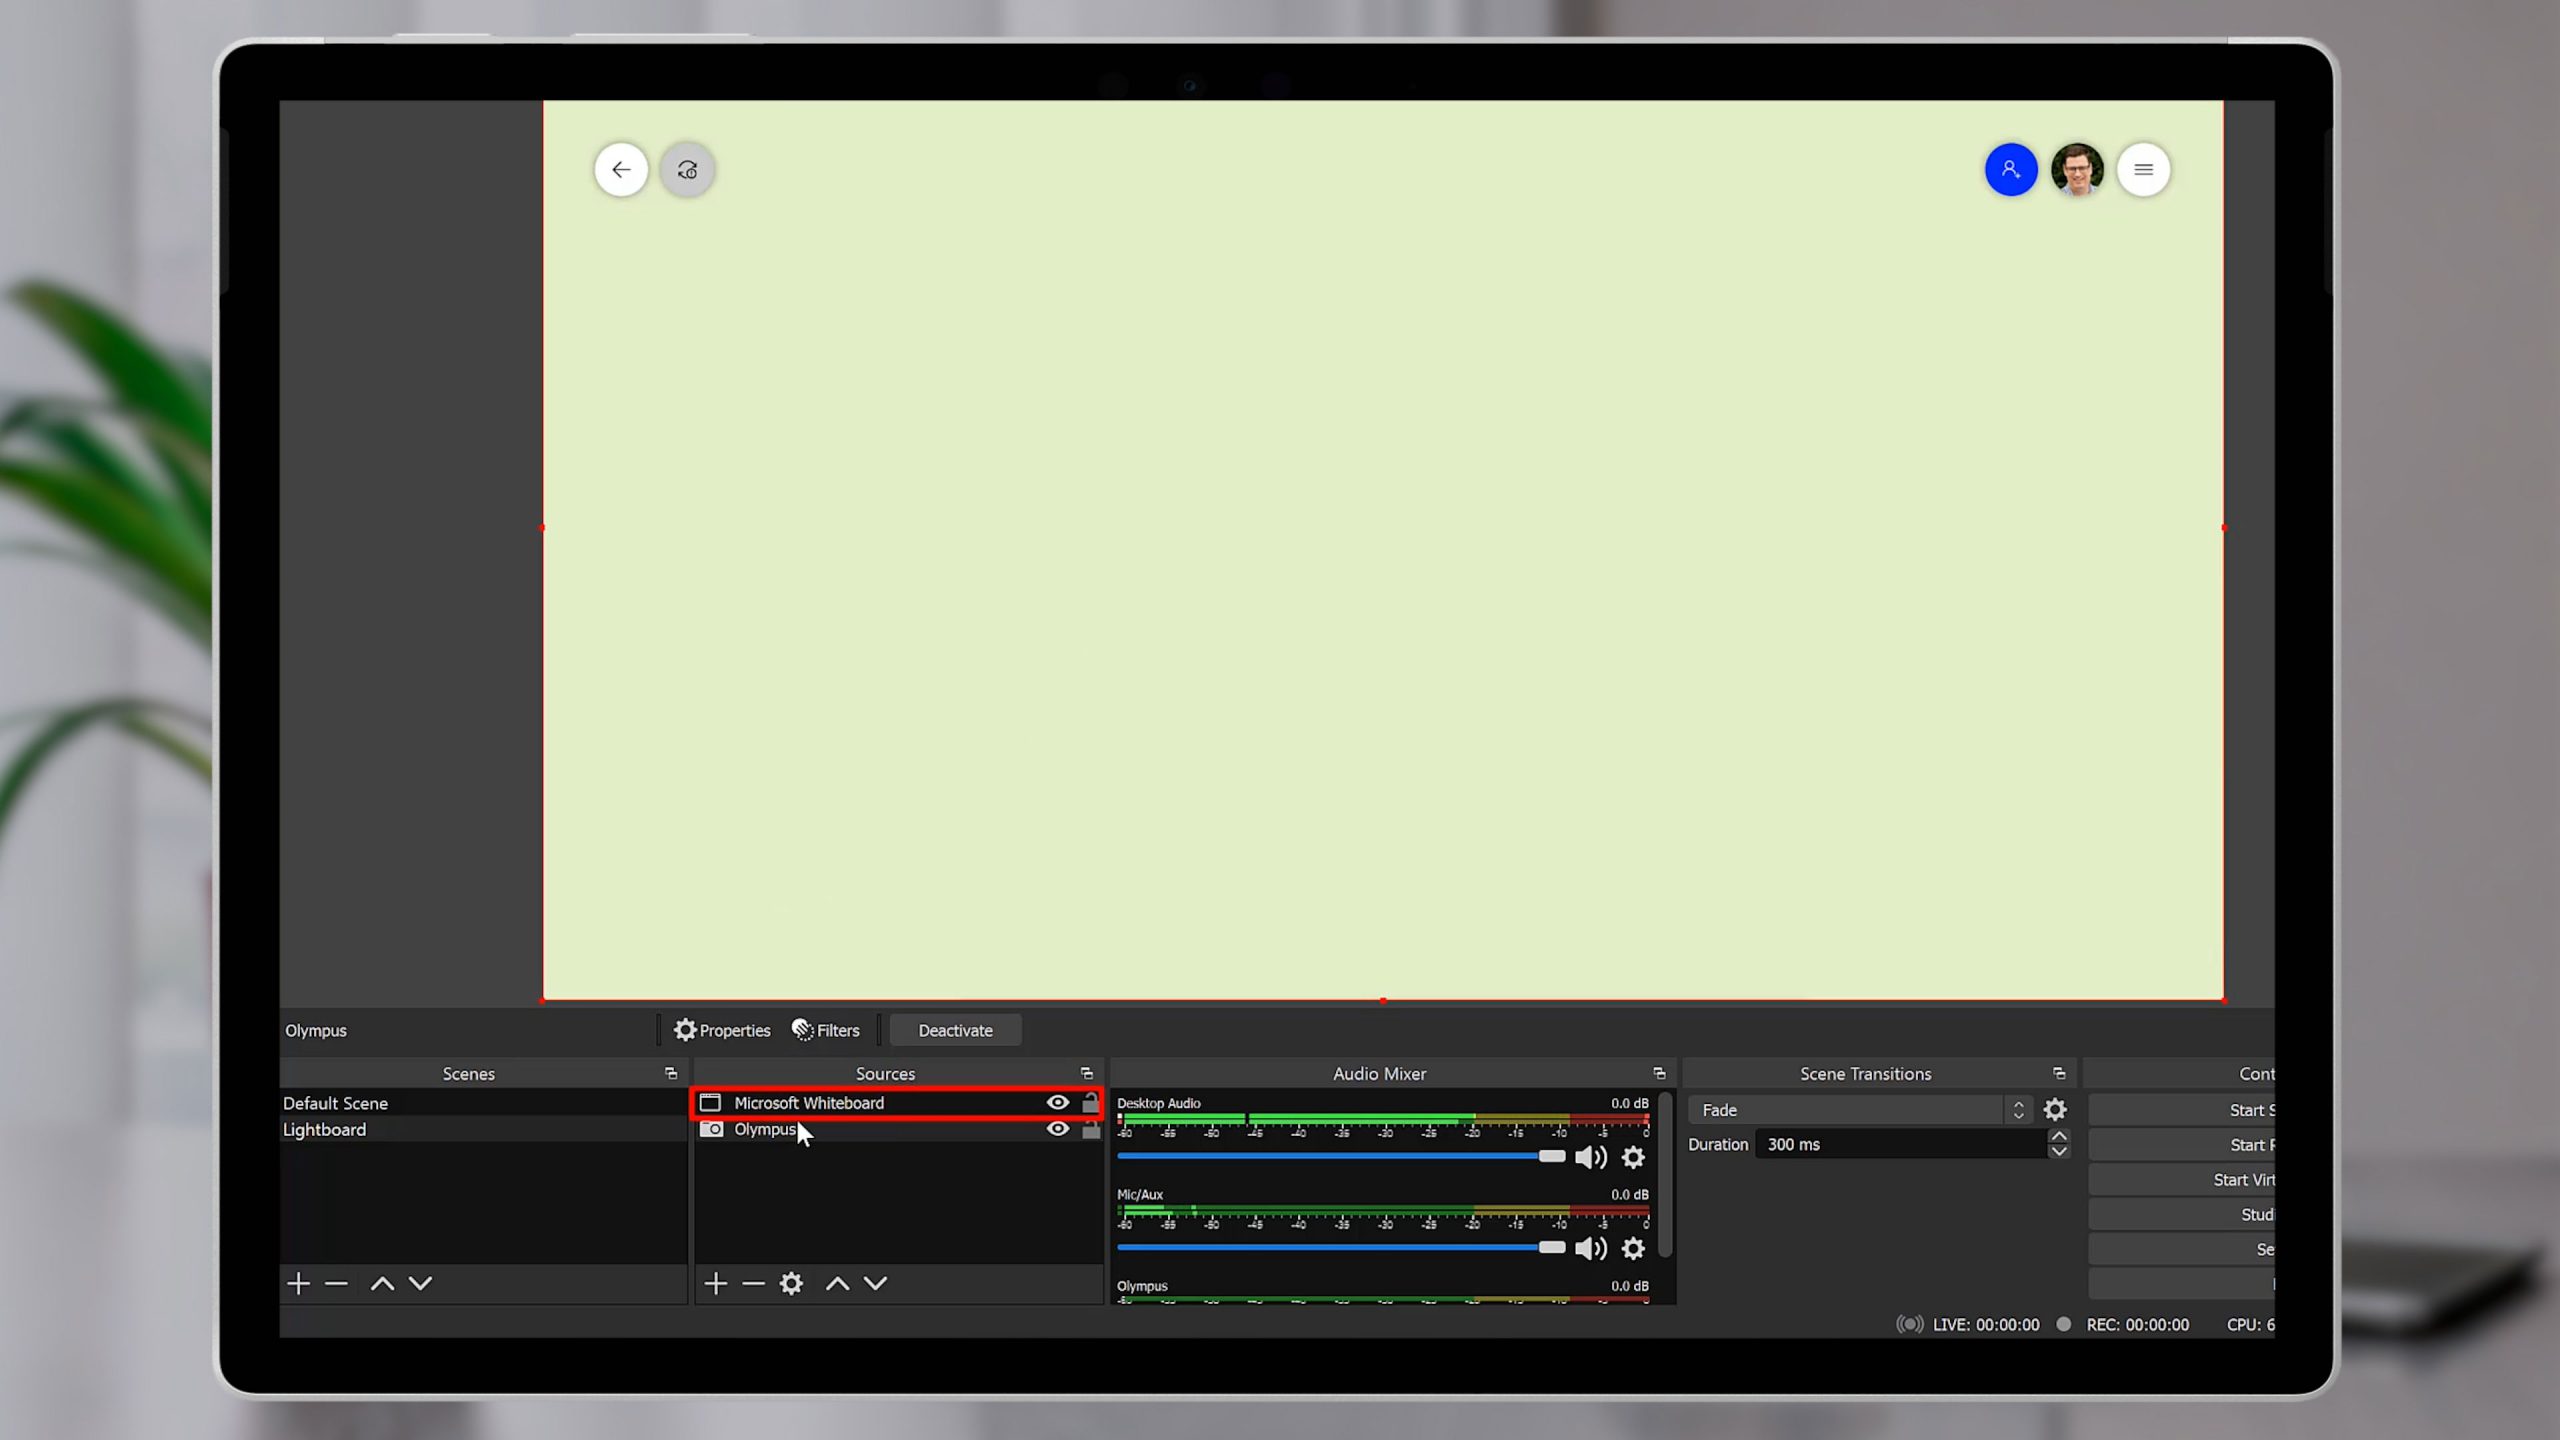
In the Sources list, make sure that your webcam is sitting below the whiteboard. Select one of your Sources and use these arrows below to move them up or down in the order. So Whiteboard should be at the top, and your webcam at the bottom. That way the whiteboard appears over the top of your video.
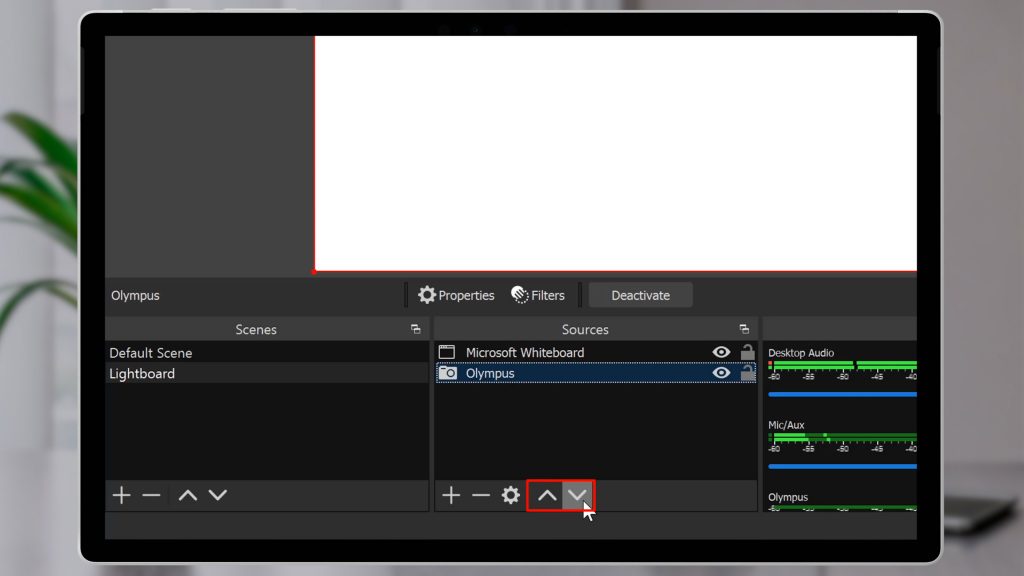
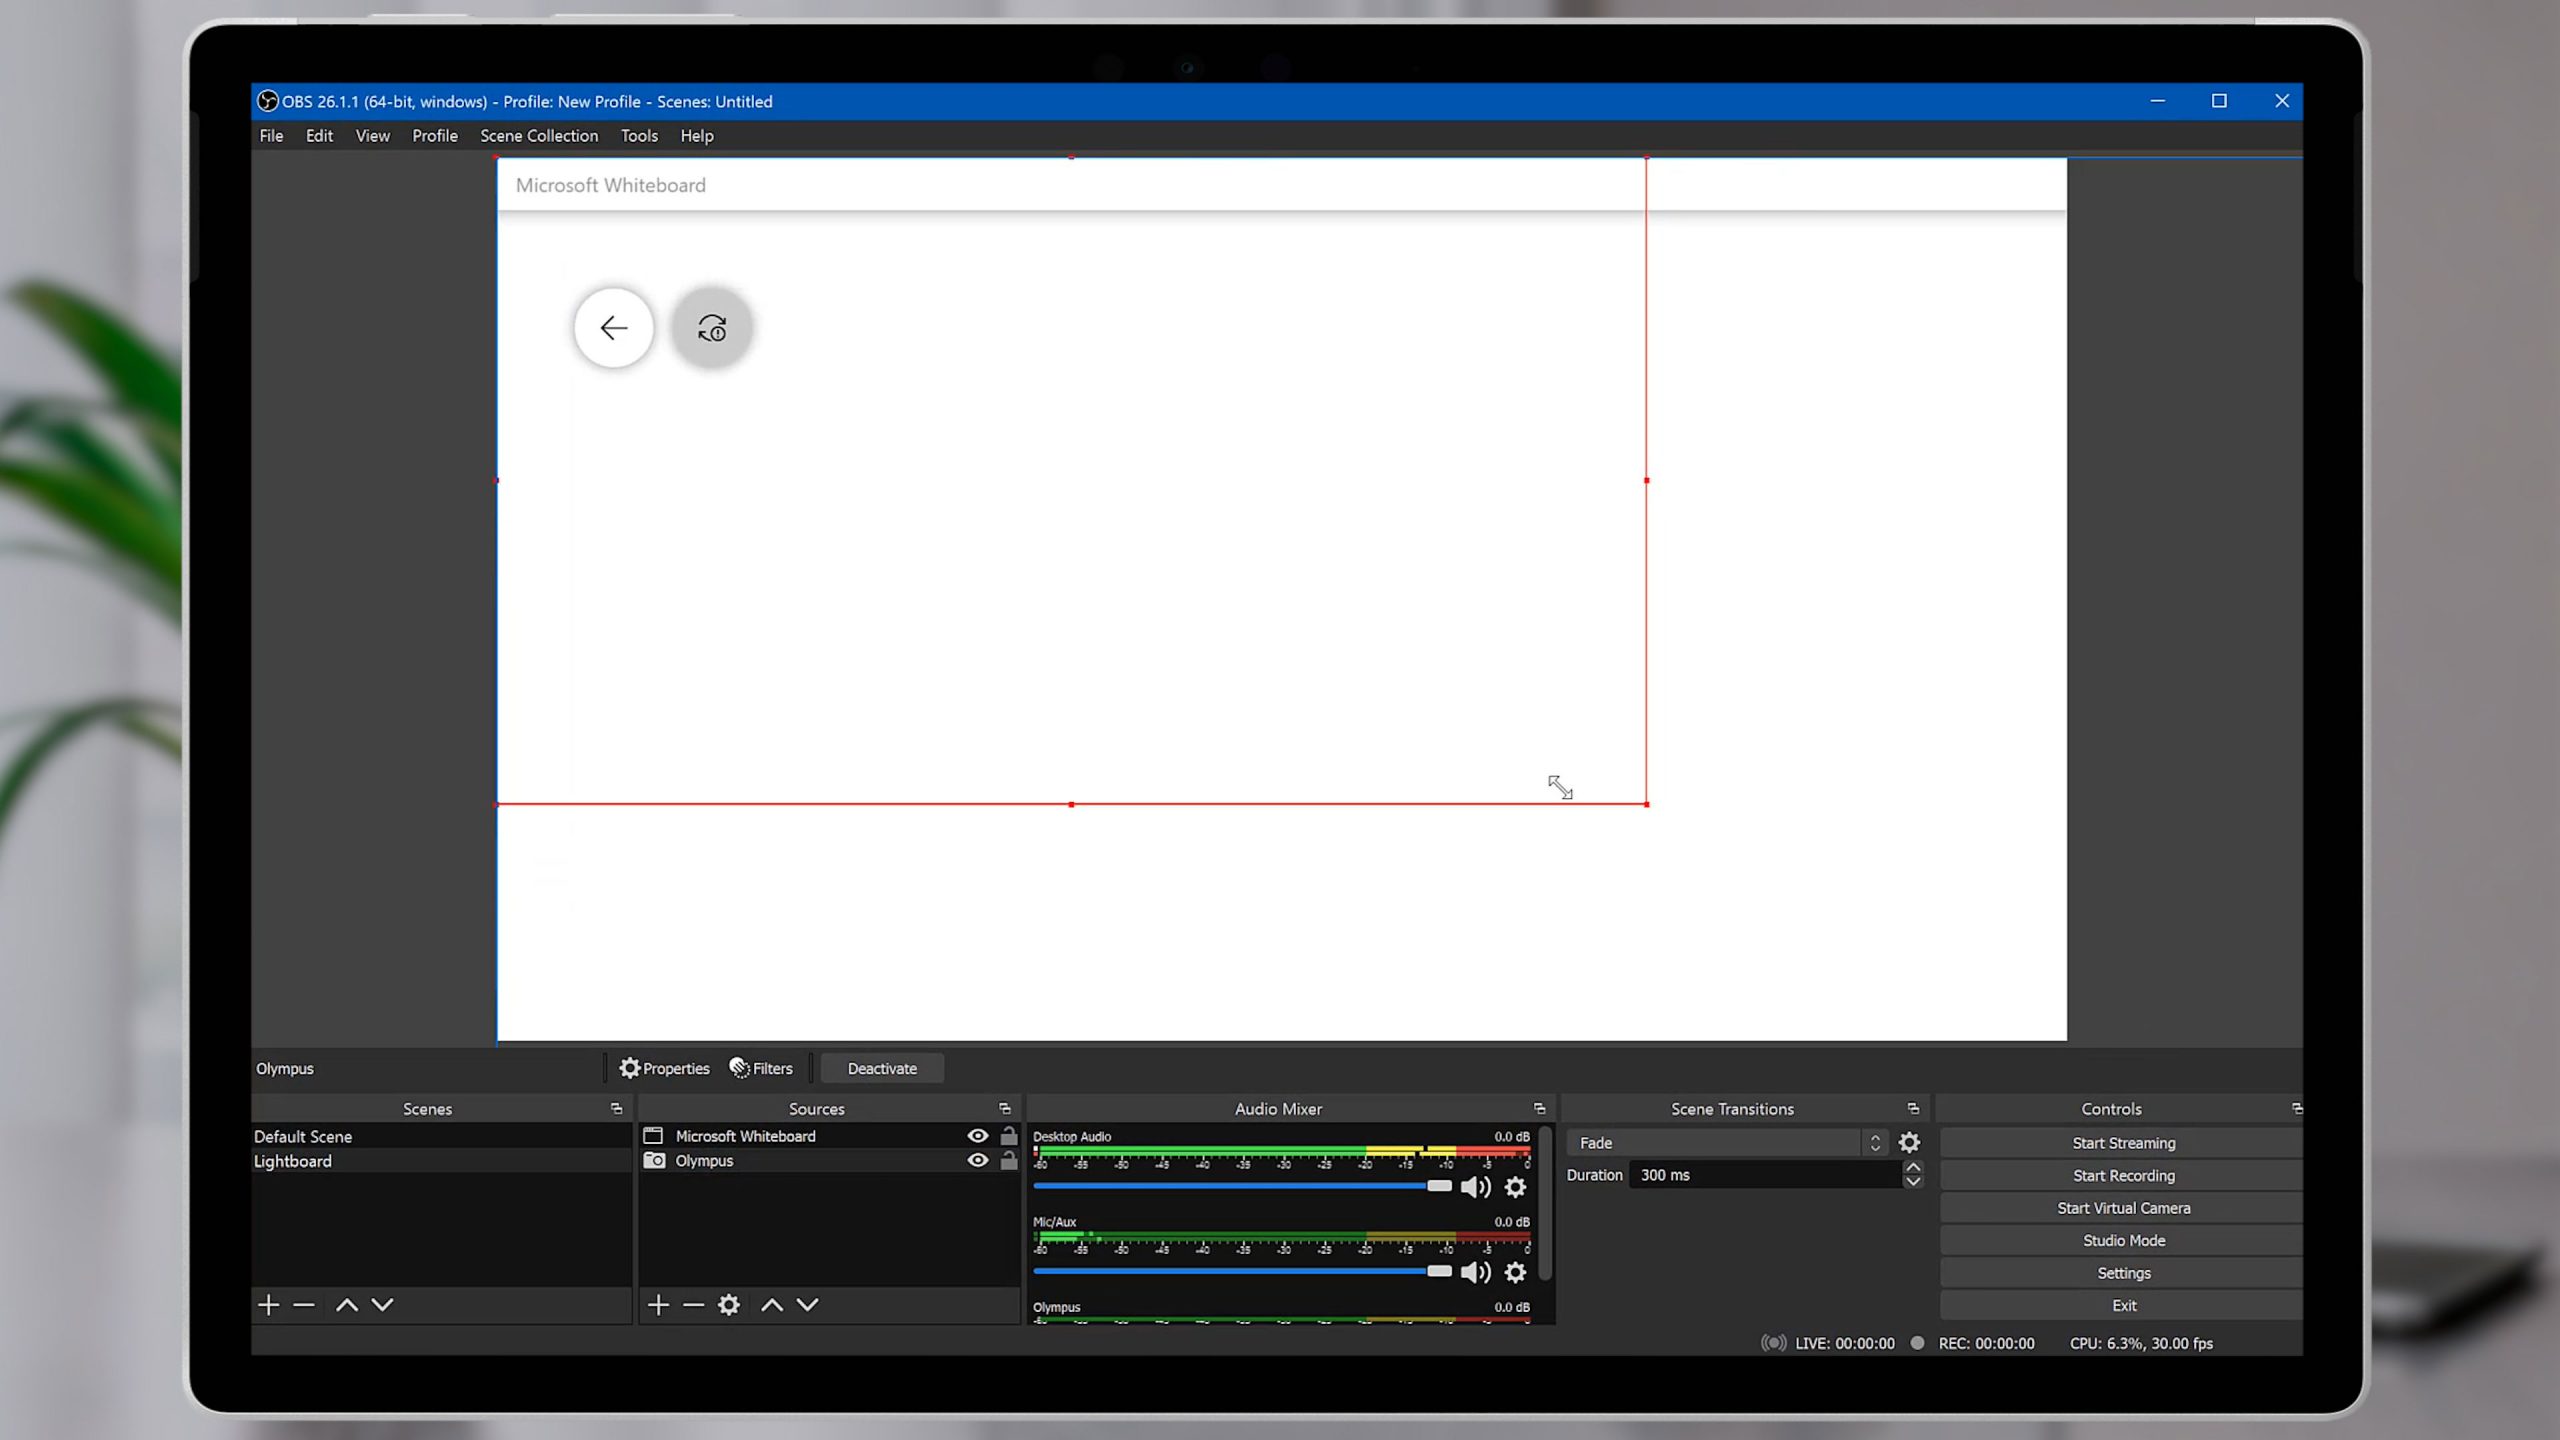
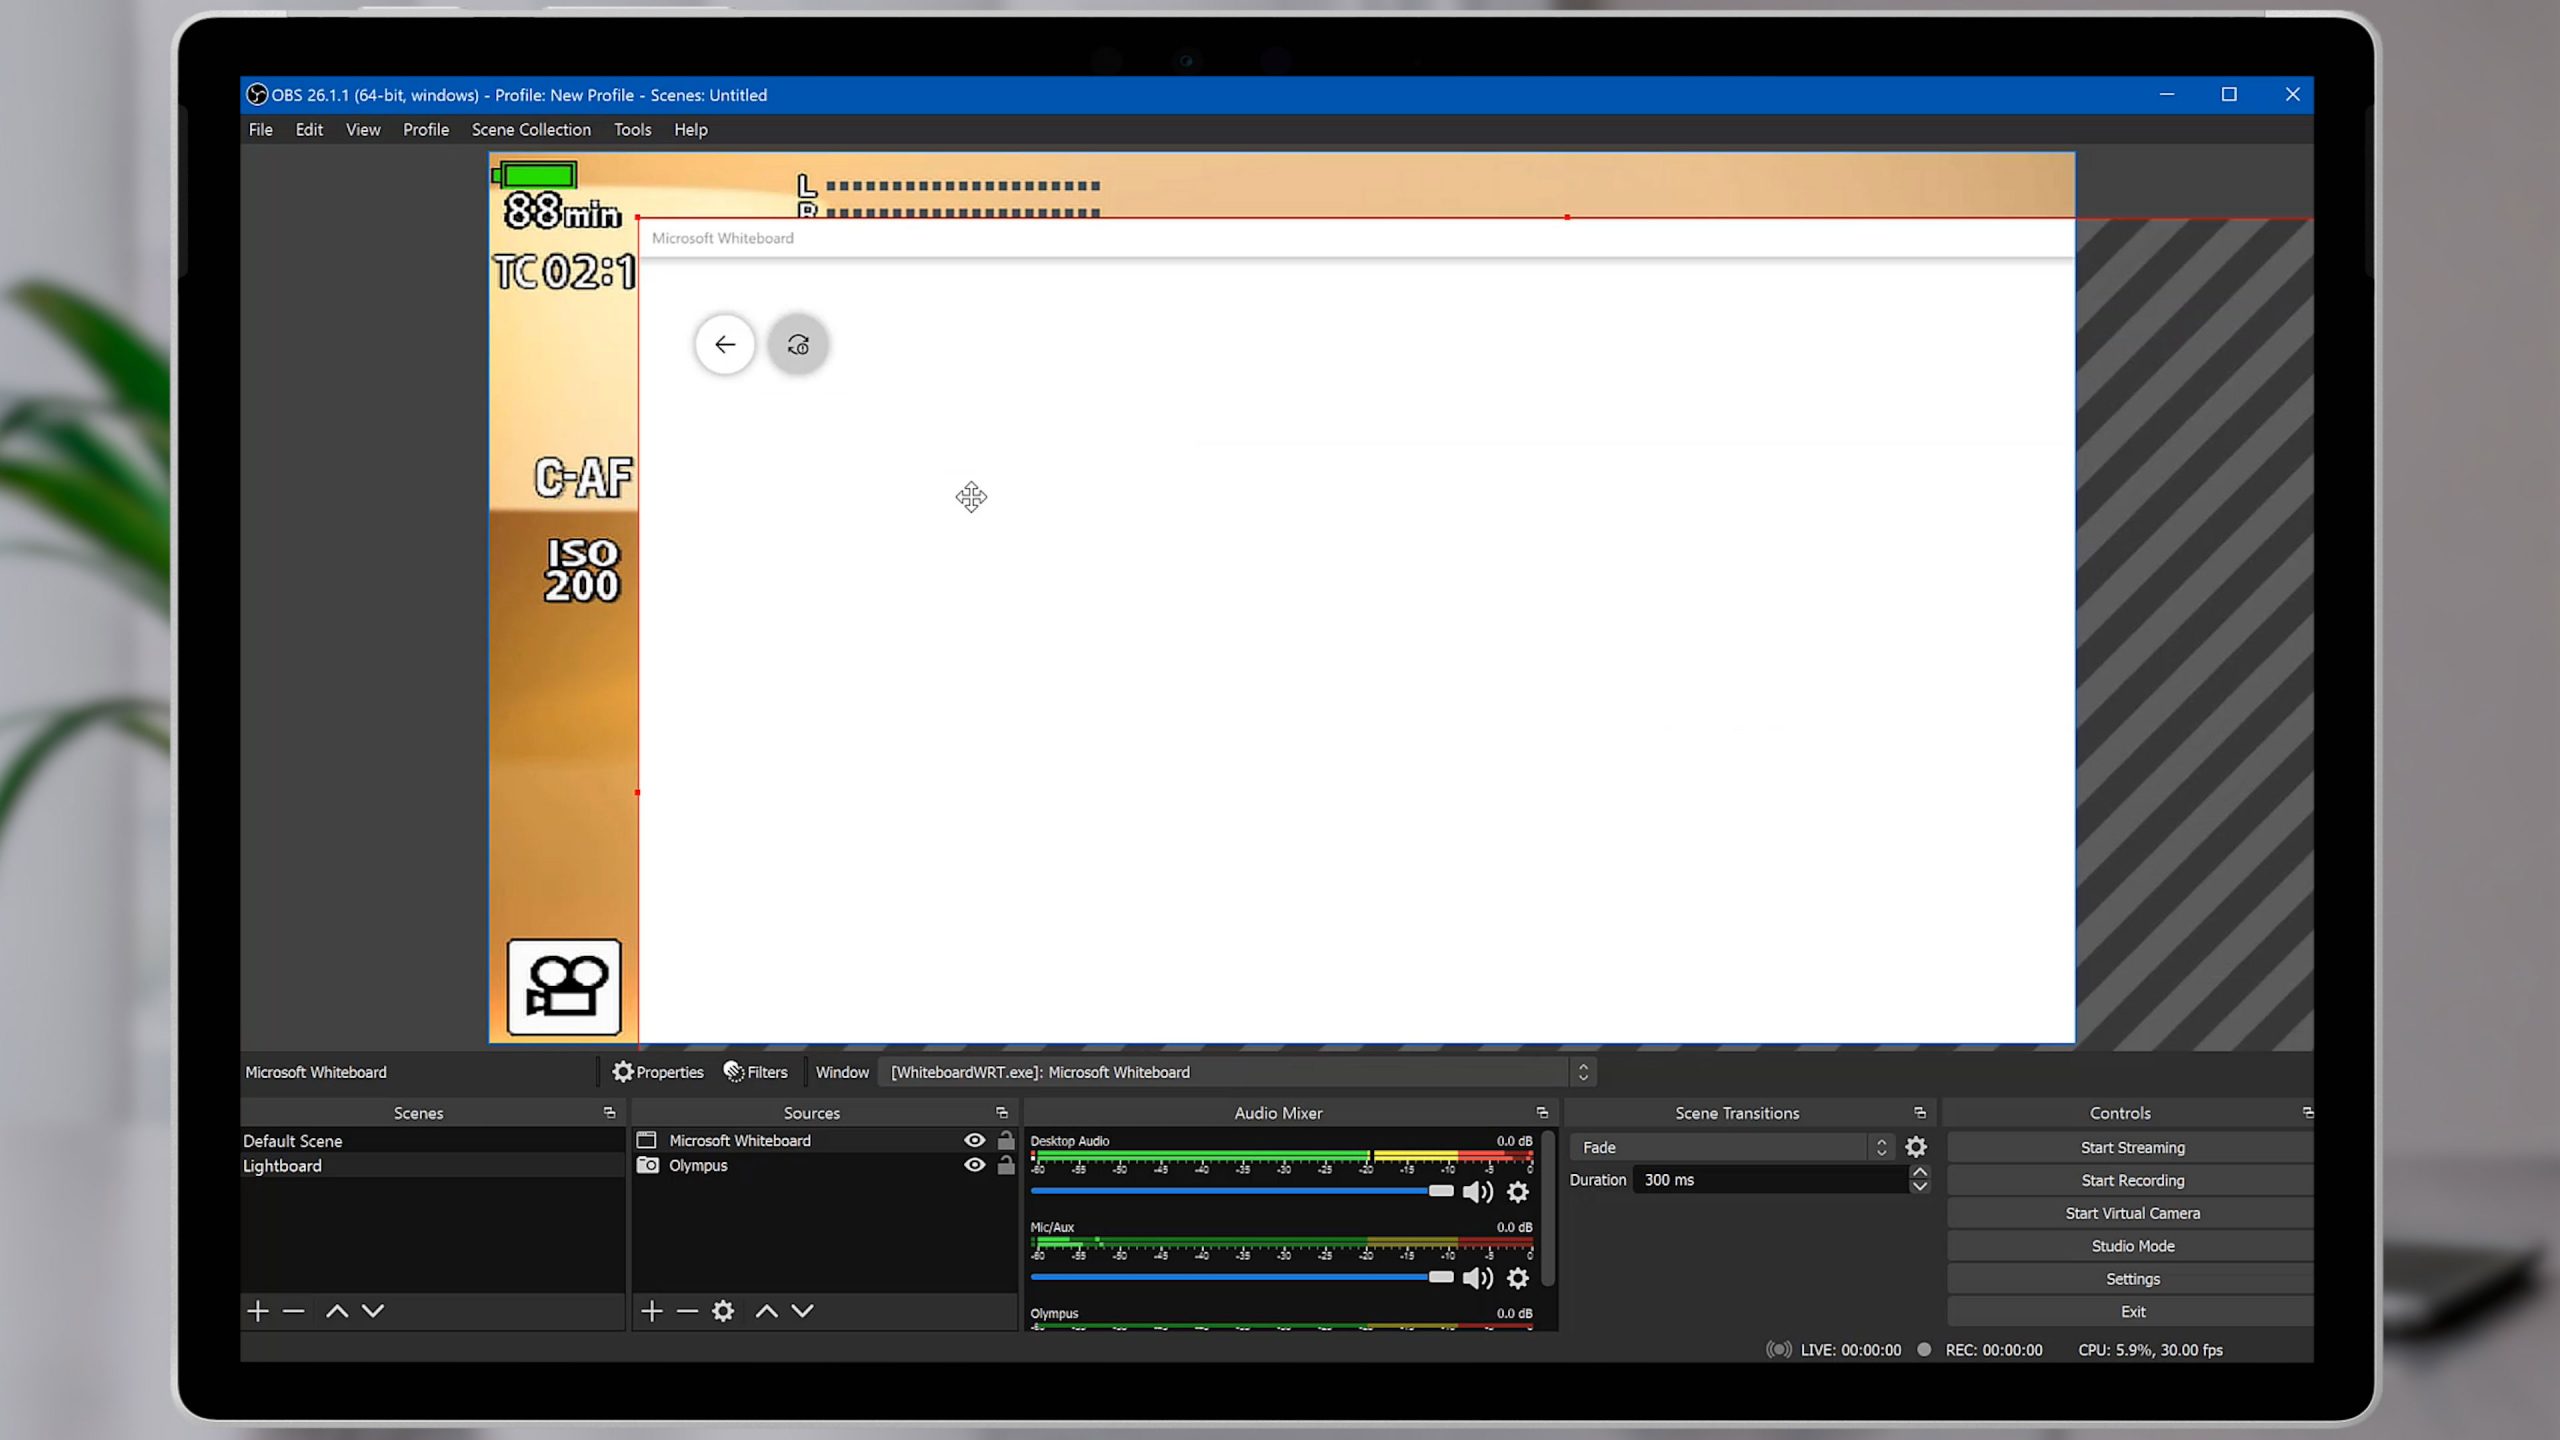
You’ll also need to play around with the window sizes here to get them right. Click on the webcam in the Sources list and make sure it’s sitting correctly in the preview window. You may need to resize it using the red border, and reposition it in the Scene.
Do the same with the Microsoft Whiteboard source by clicking on it. Resize and reposition it to suit. Notice that the output of the app might be a different size to your video output. If you resize your Whiteboard app to match that aspect ratio, it will automatically update in OBS.
Step 7: Remove the Microsoft Whiteboard background
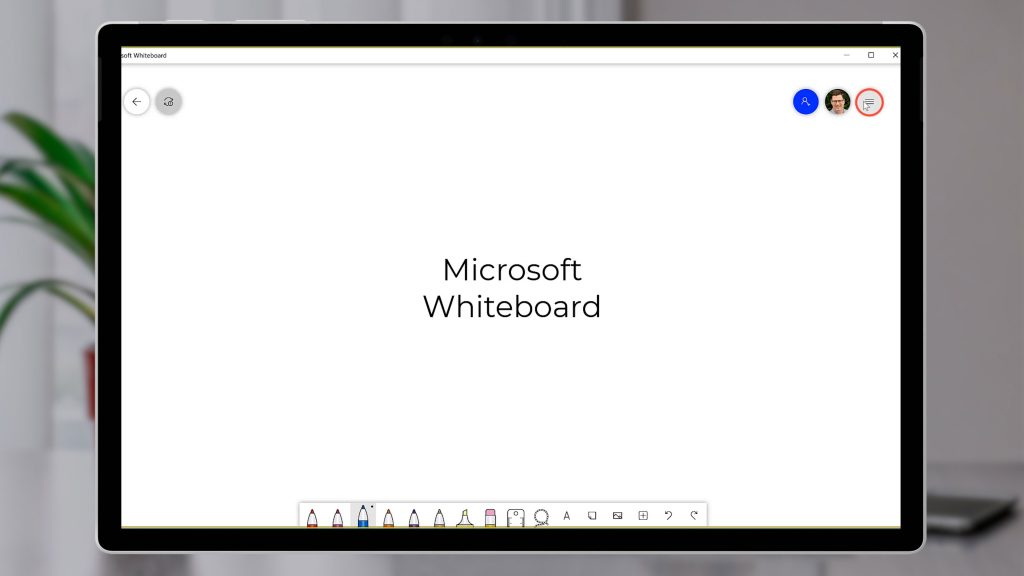
So now that we’ve got the sizing right, we need to make the background of the Whiteboard disappear. So let’s jump over to the Whiteboard app. We need a different background colour, because we’re going to use a green screen effect in OBS to make it disappear. So let’s select the menu in the top right corner and choose “Format background”.
We’ll choose this light green colour from the options.
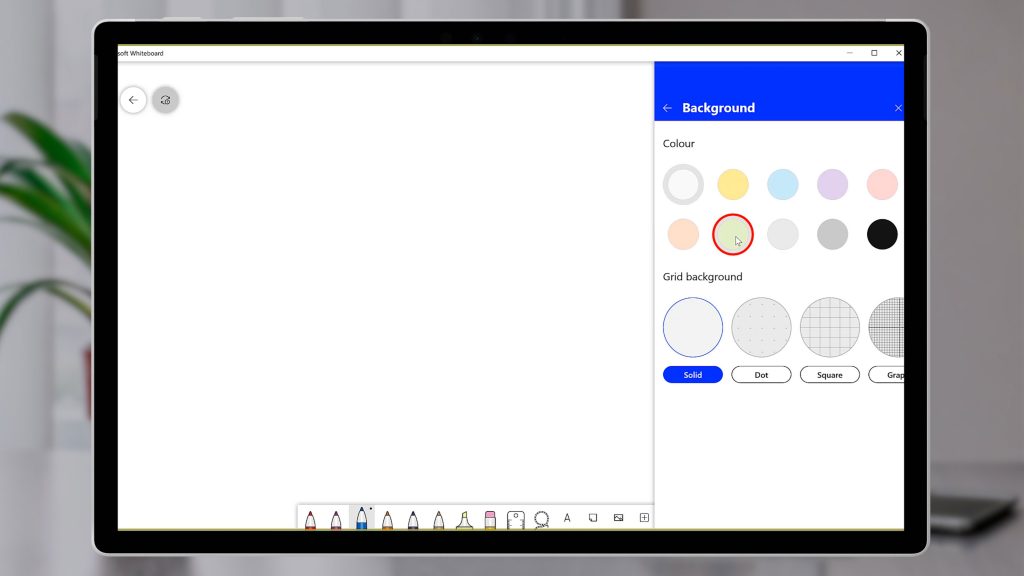
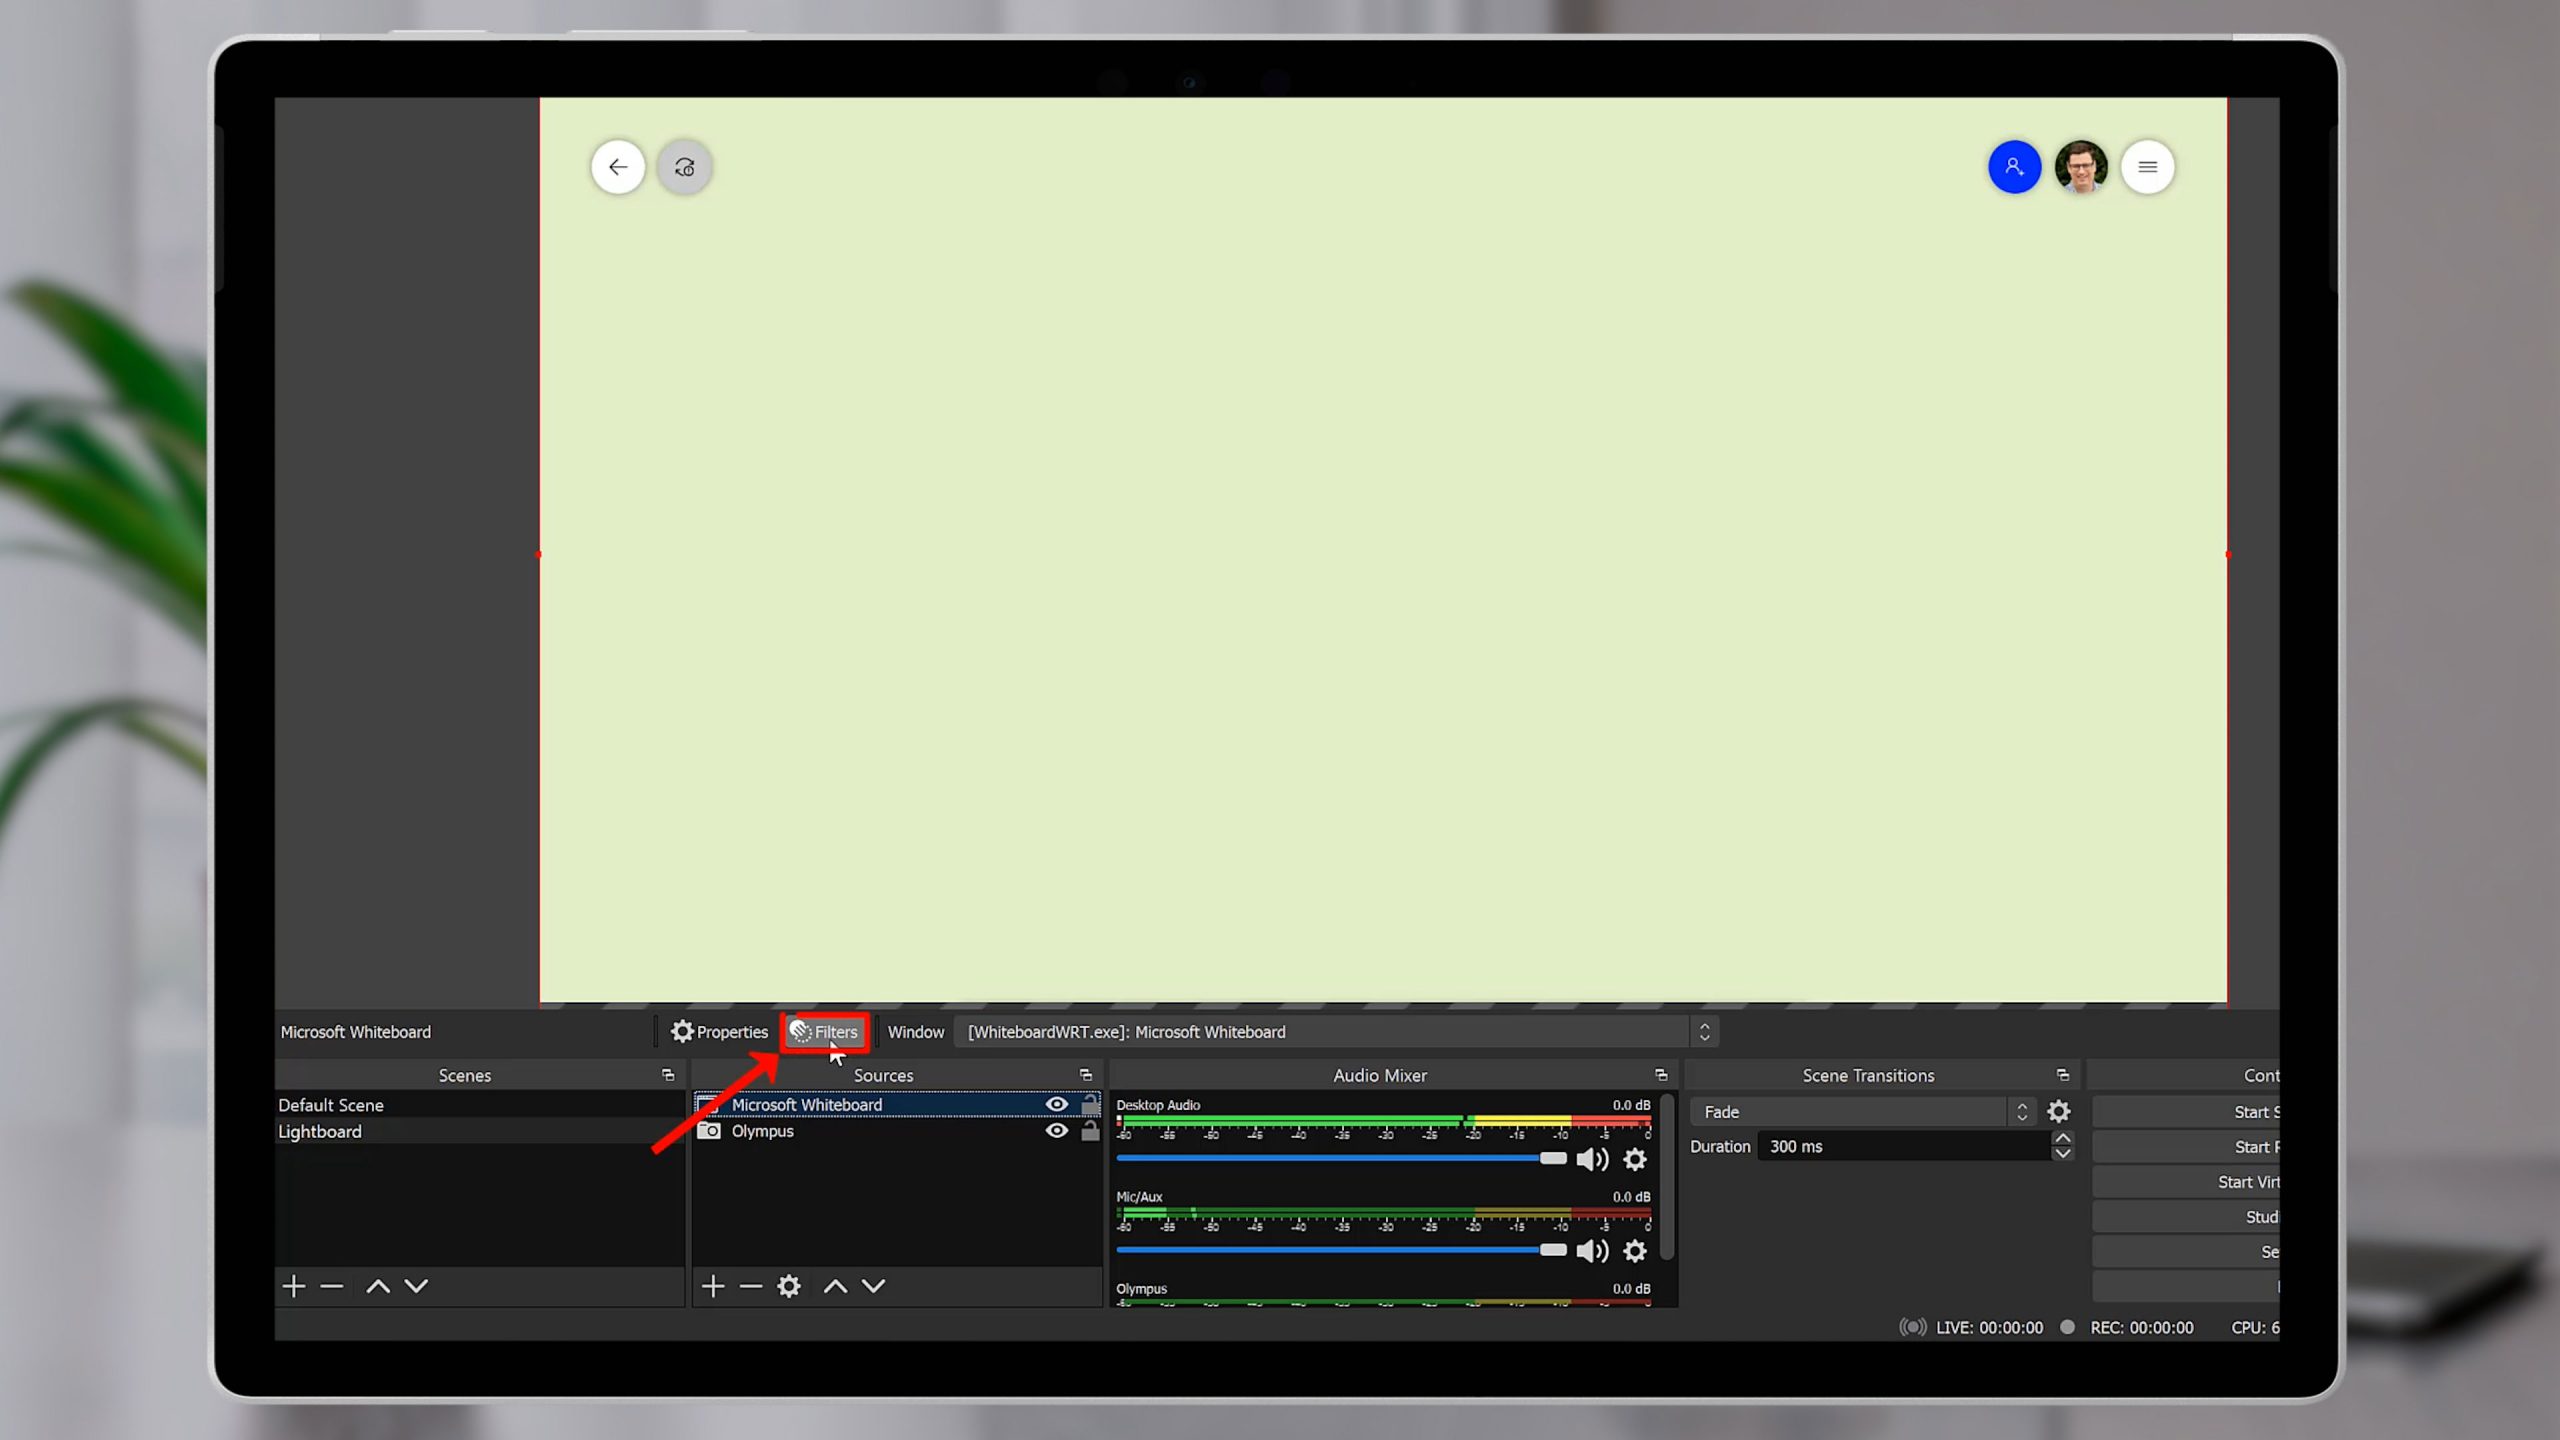
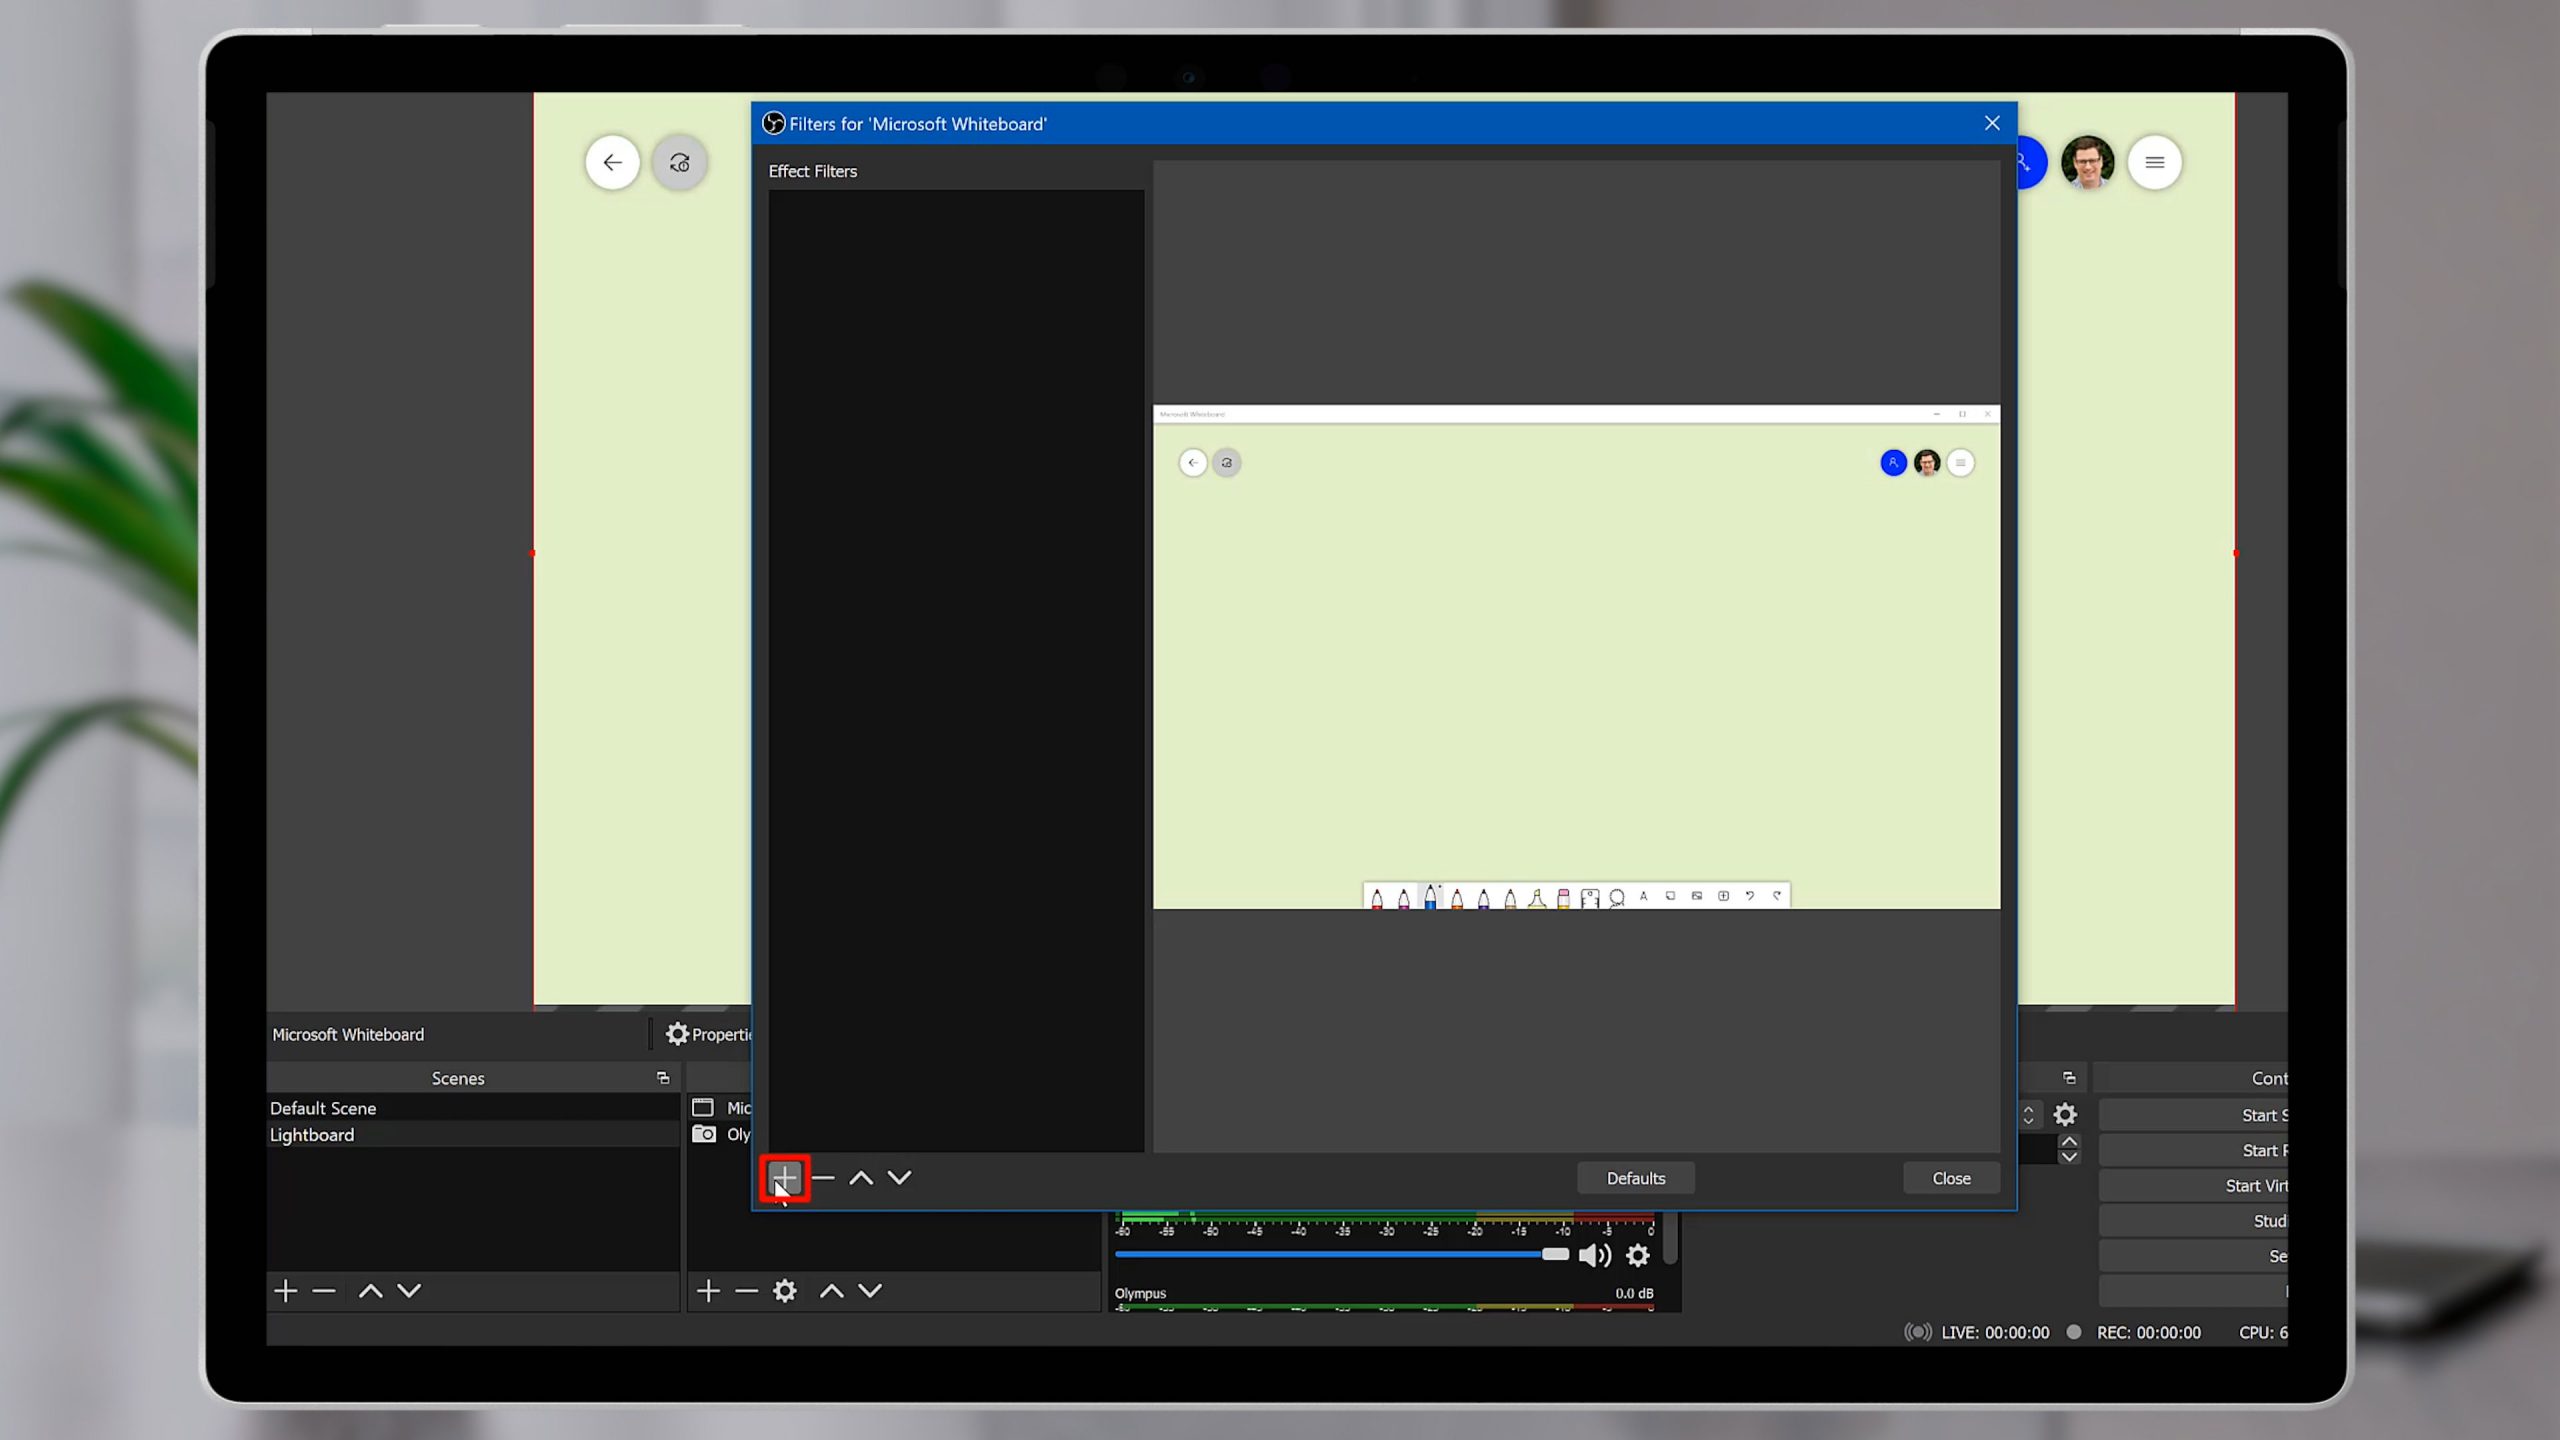
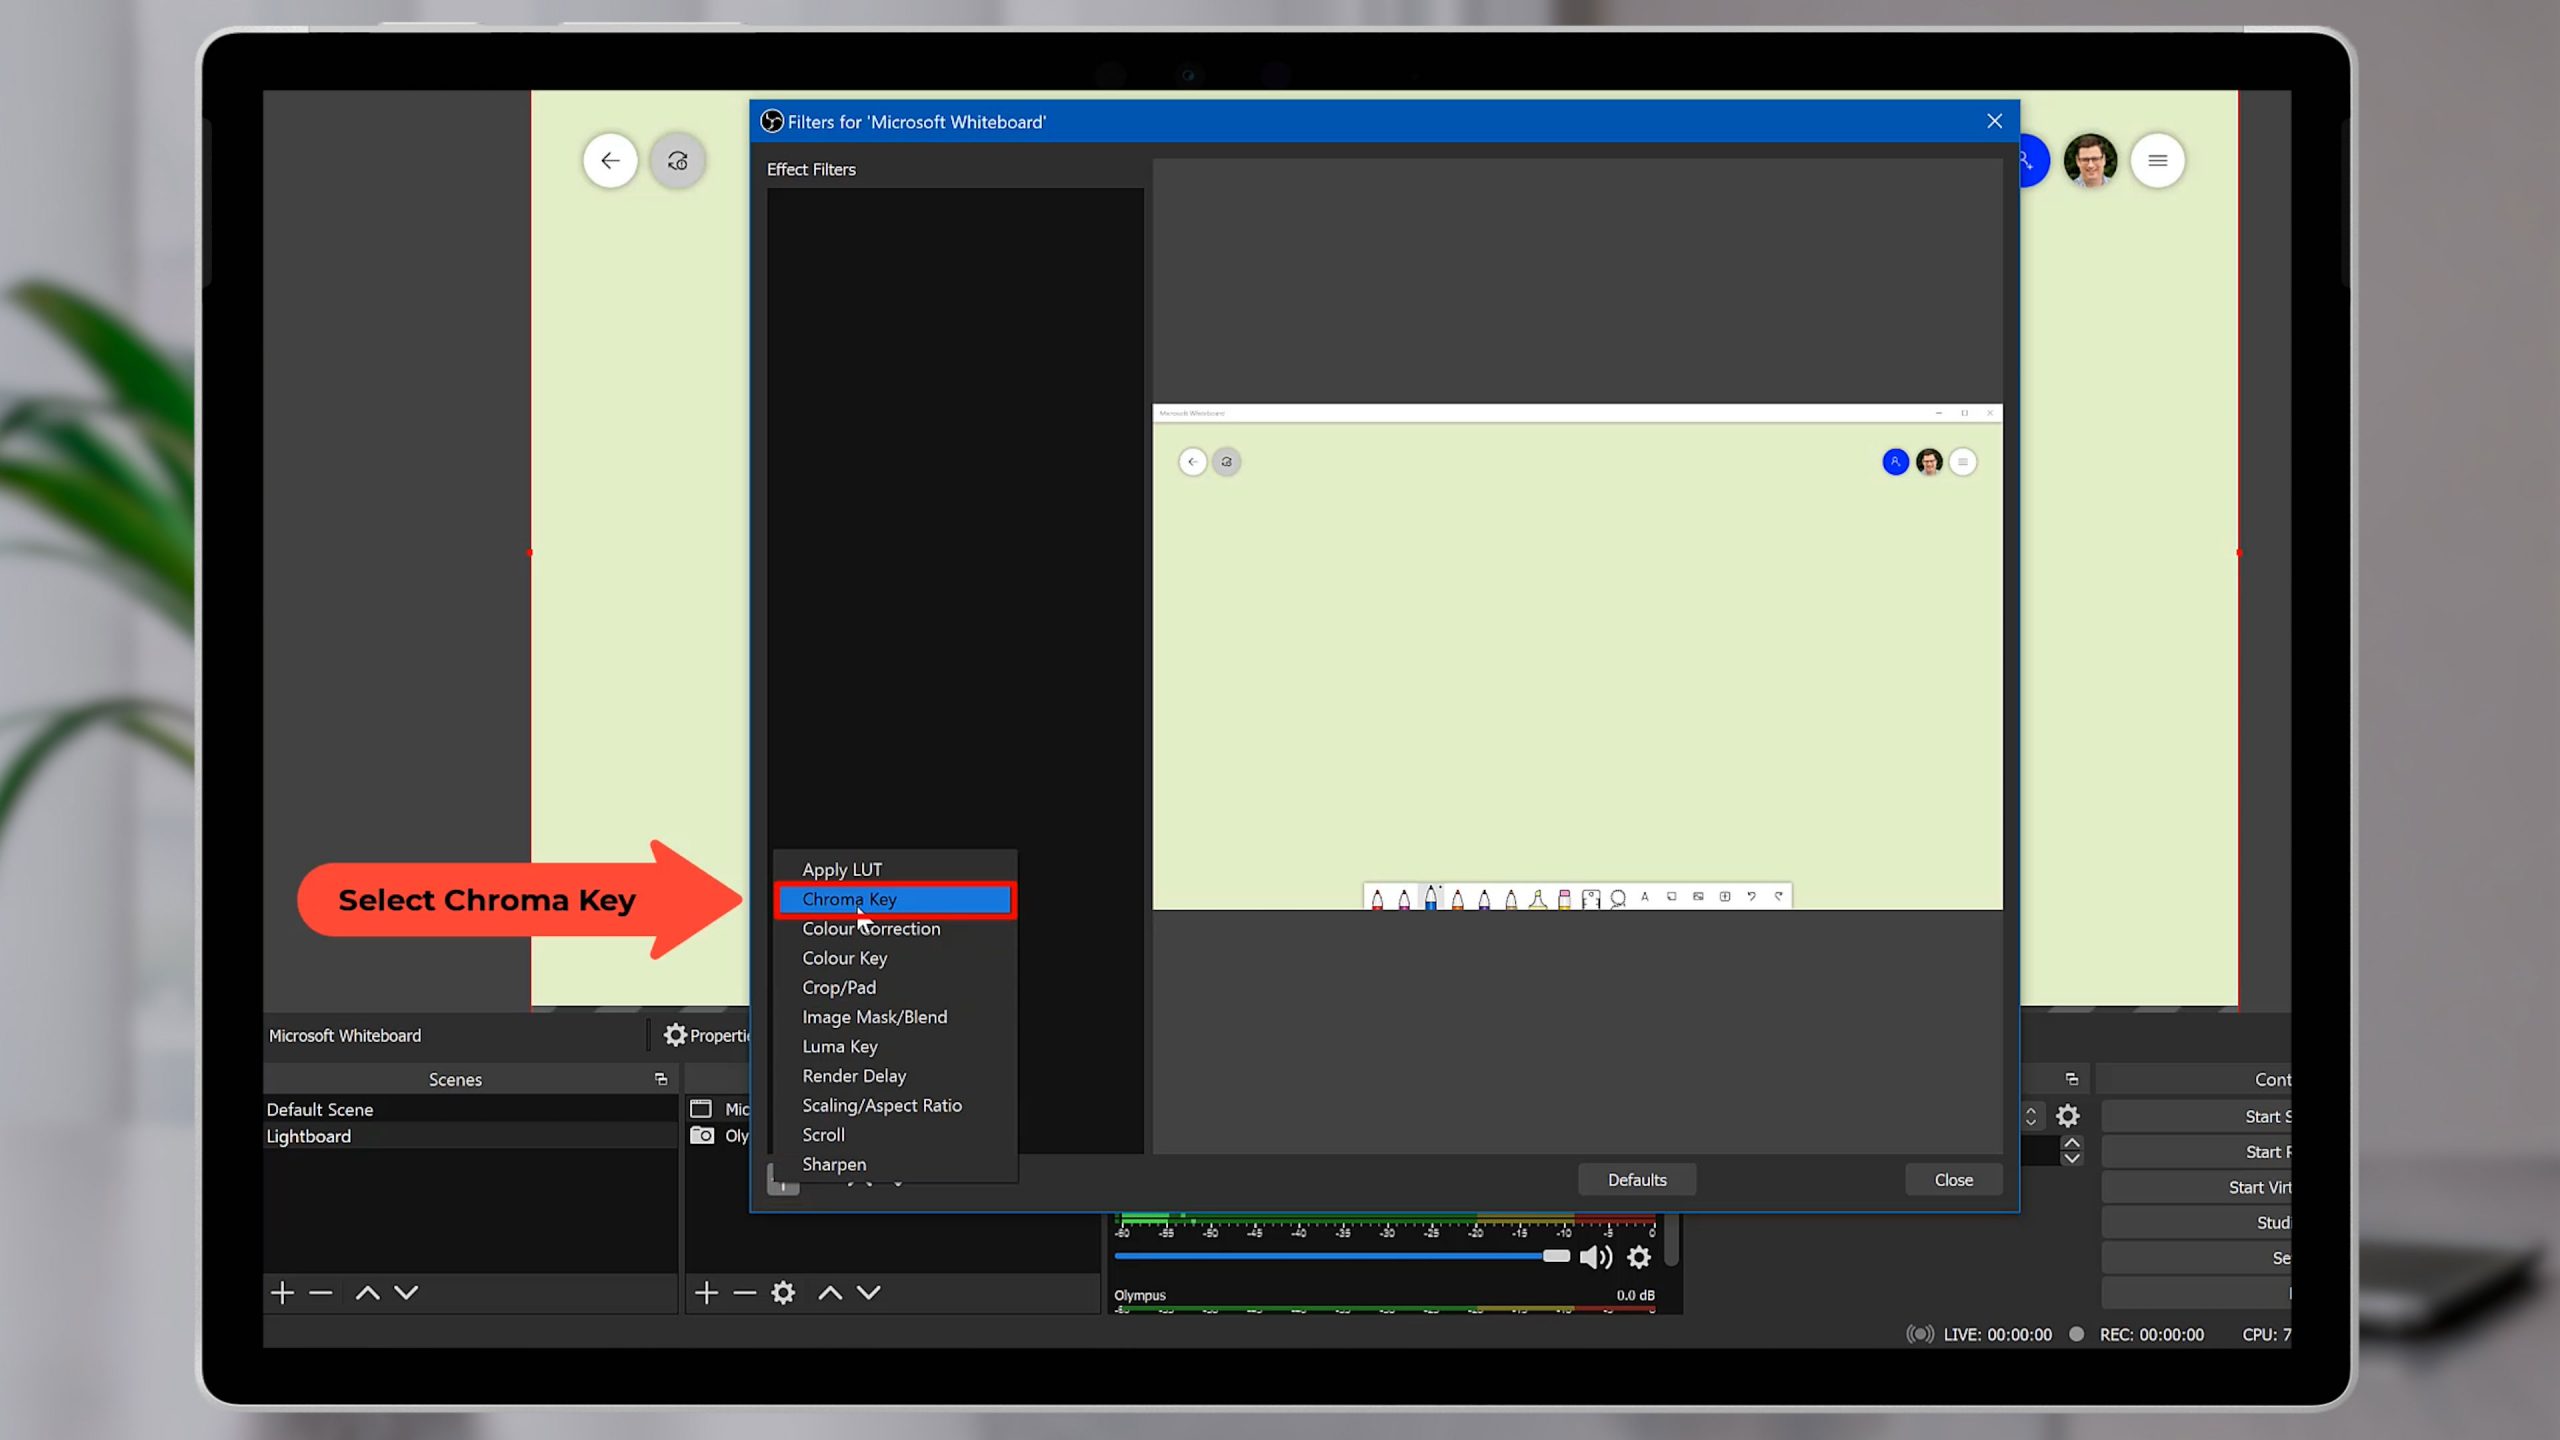
Now that our background is light green, let’s go back into OBS. Under the Sources list, you need to click on “Microsoft Whiteboard”. Just above it, under the preview window you’ll see “Filters”. Click on Filters and use the plus icon in the bottom left corner to create a new filter. Choose “Chroma Key”, leave the name as Chroma Key and press ok.
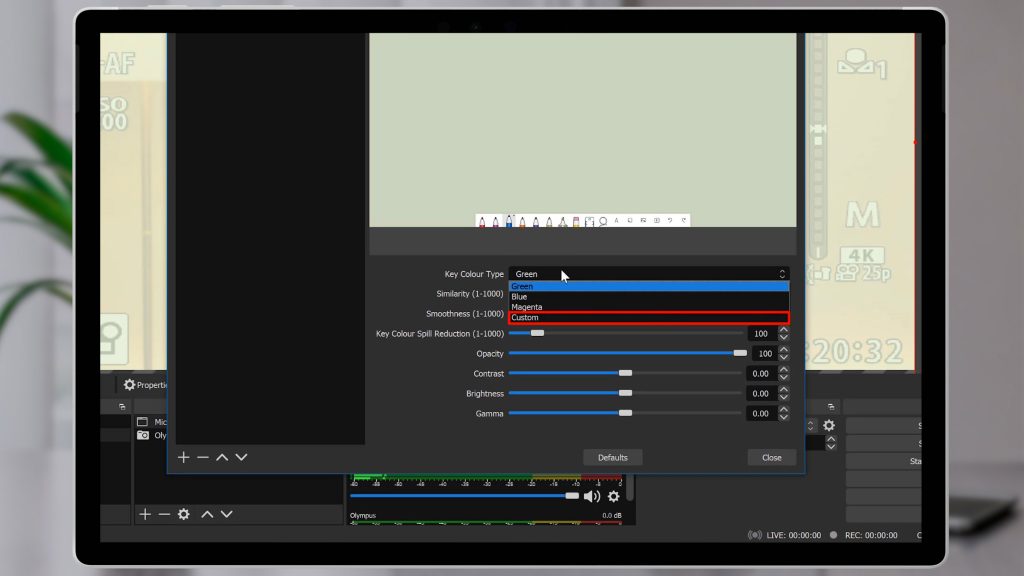
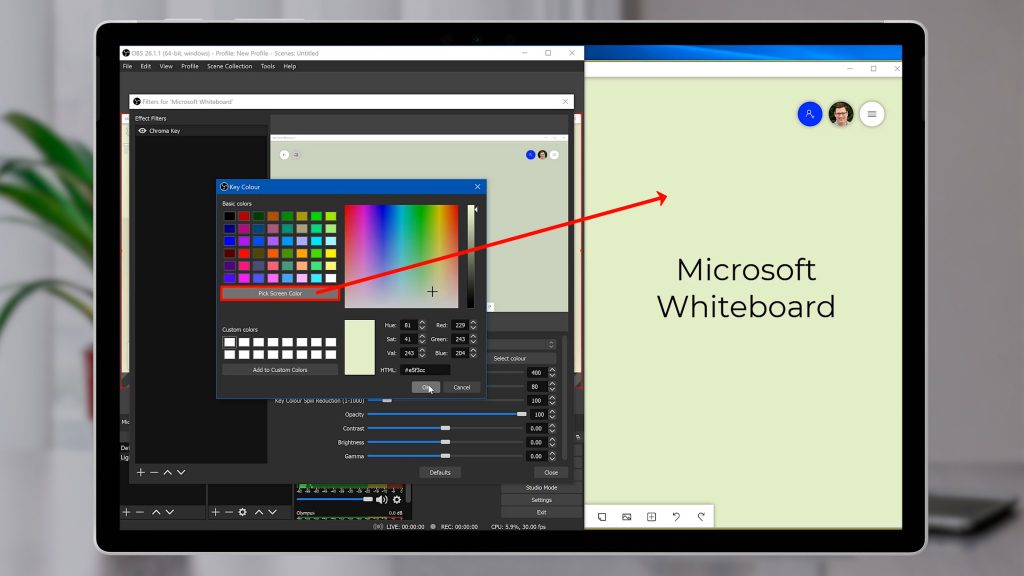
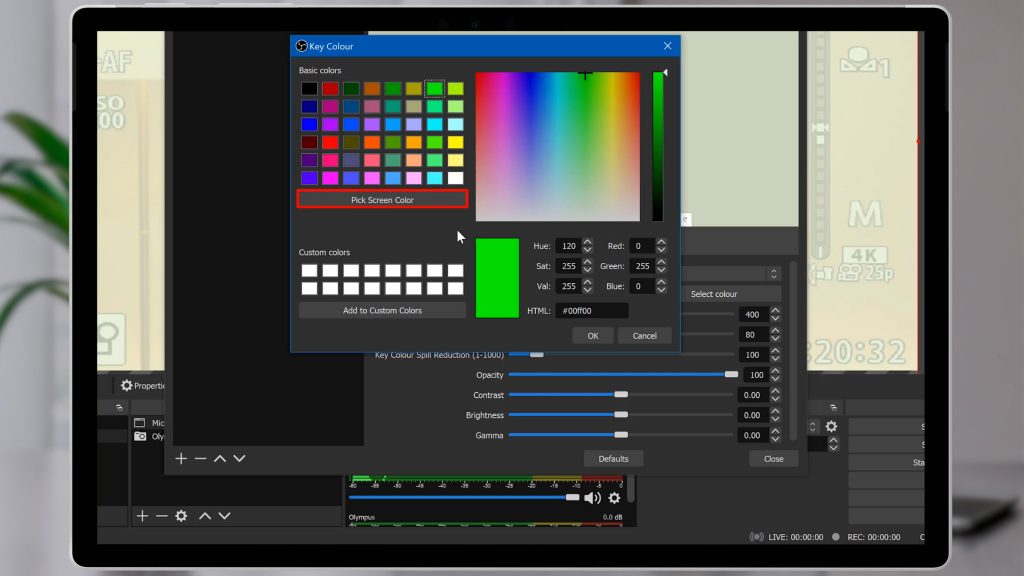
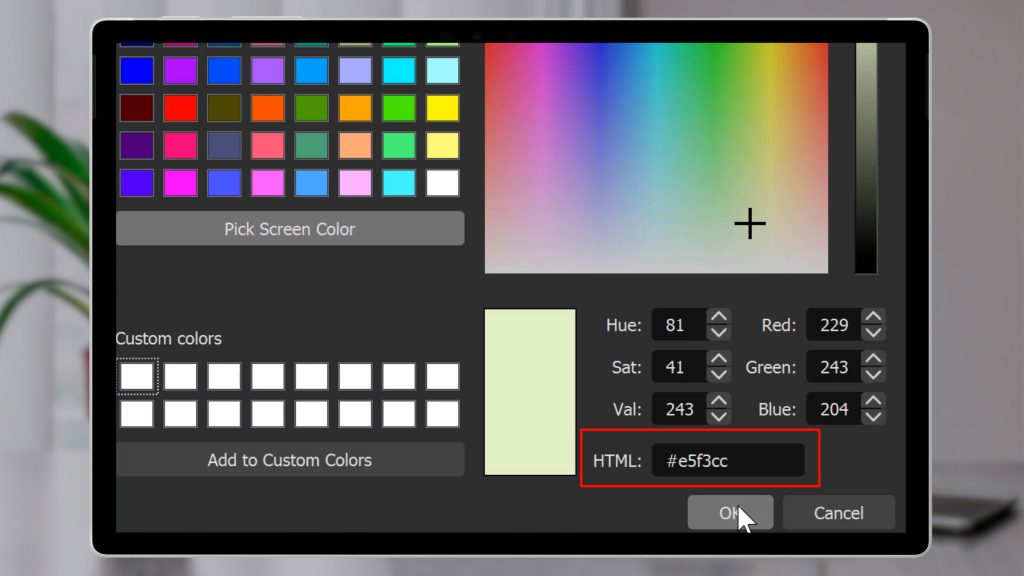
We need to change a few options here on this filter to make this work, so we’ll start by dropping down the “Key Colour Type” list and selecting “Custom”. Then click “Pick Screen Color”. This allows you to pick any colour from the screen as it appears right now. So you may need to arrange your windows first so that the Whiteboard is showing when you do this. I use Windows snap to split the screen. If you don’t know how to split the screen, click here.
So click on “Pick Screen Color” and click on that green colour in the Whiteboard app. You should see it now reflected there on the bottom right as #e5f3CC. You could even just type that code in if you prefer. Press OK to close the colour picker.
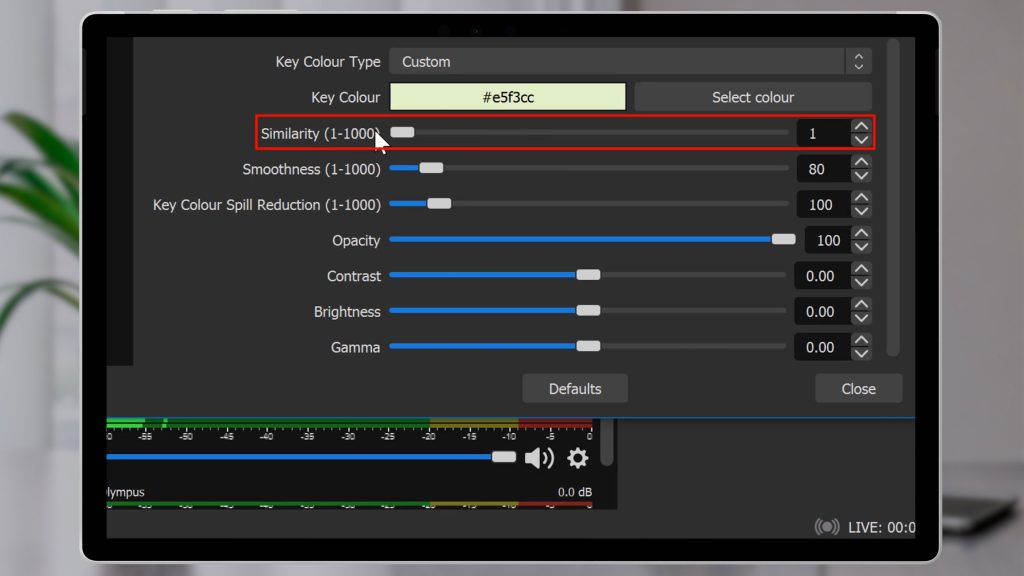
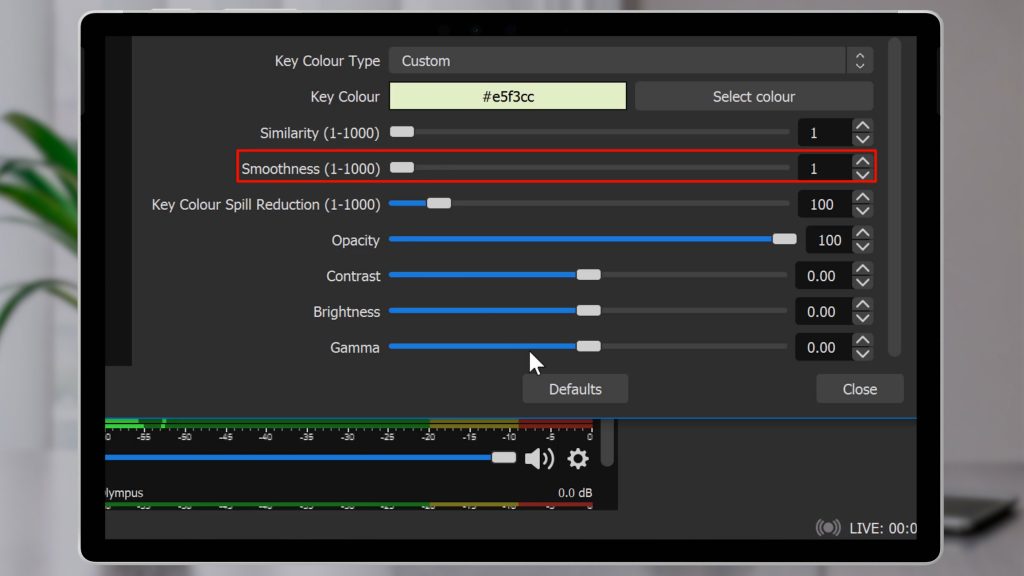
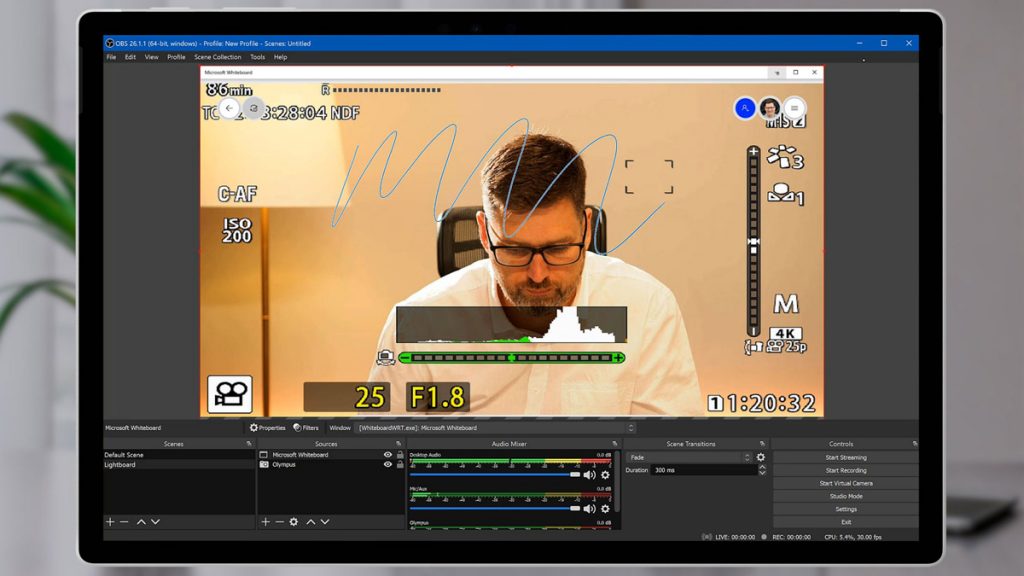
So we’ve now set that light green colour to be transparent using chroma key we need to tweak a few setting here. We’re going to set “Similarity” to 1 and “Smoothness” to 1. The rest of the settings we’ll leave as default. Then we’ll close this window. You should now see that your app is see-through, and you’re appearing in the whiteboard. Grab your pen and start drawing to see what happens!
How to use your DIY Glassboard/Lightboard in Teams or Zoom
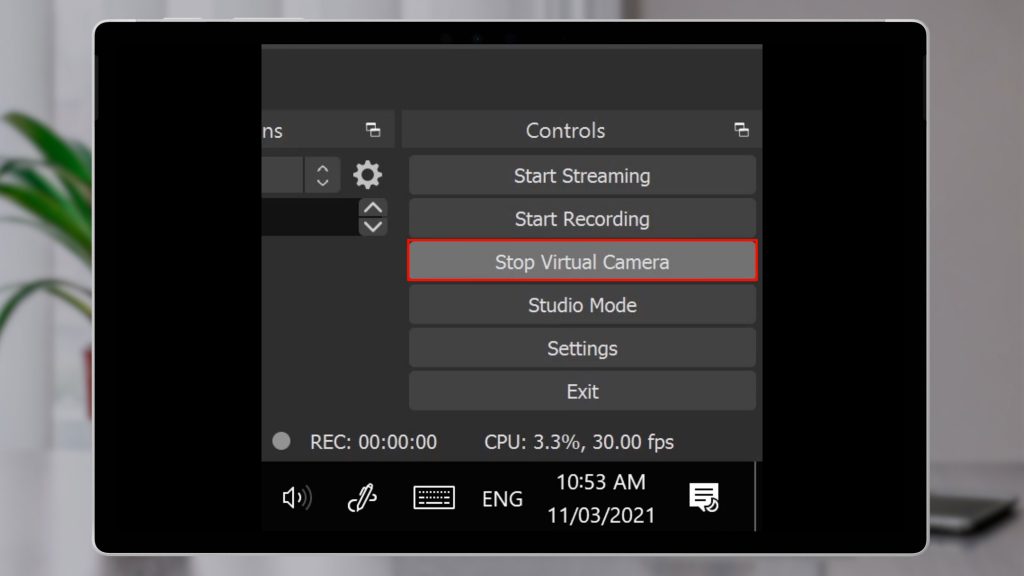
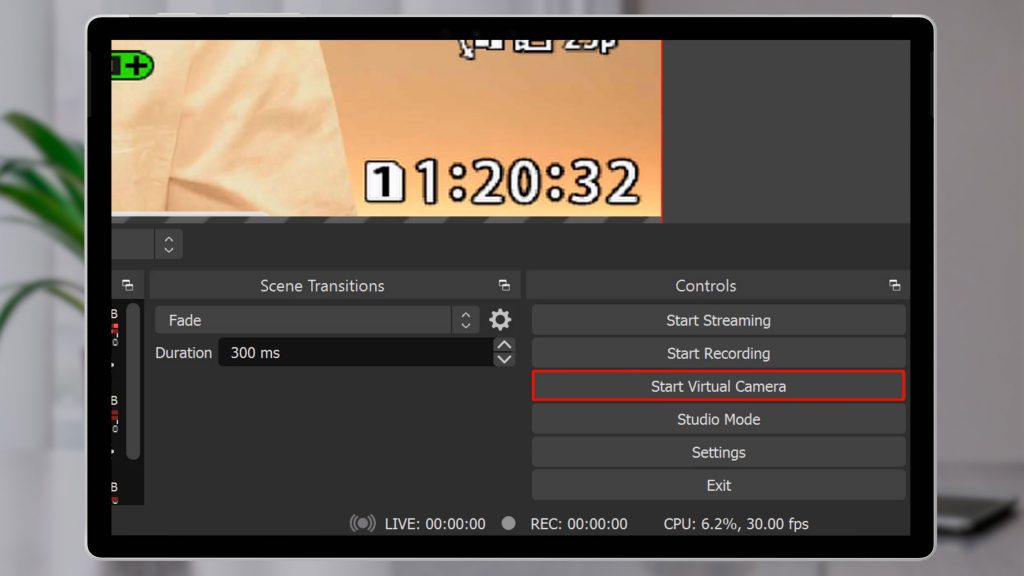
So that’s the setup done. This Scene will be saved in OBS for next time. But how do we get this into Teams or Zoom? We’ll show you both. Firstly, you need to have OBS running. And you need to start the Virtual Camera. Under controls on the bottom right, click on Start Virtual Camera.
If you’ve only got the one camera – when you go into Zoom or Teams and join a call you might find that your camera is blank.
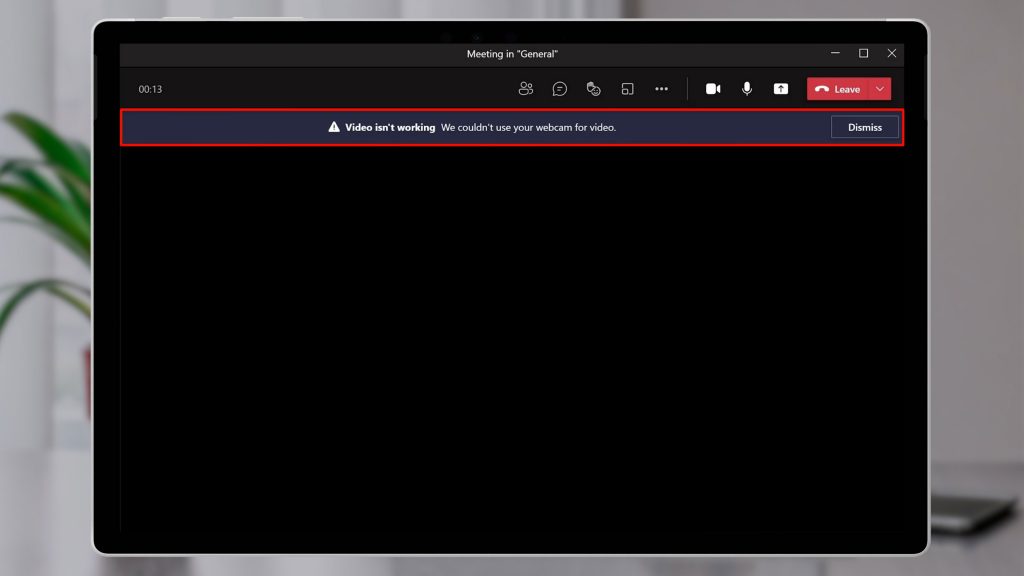
This is because OBS is already using it and it can’t be accessed by two programs at once. But don’t worry, you’re going to see the camera working in Teams or Zoom in the next step. If you’re using a separate camera – which I recommend so that you get the best angle and setup – you won’t have this problem.
Using OBS in Zoom
Firstly, let’s look at Zoom. If you’re on a call or in a meeting already, you can change the camera on the fly by selecting the up arrow along side the video icon and selecting “OBS Virtual Camera”.
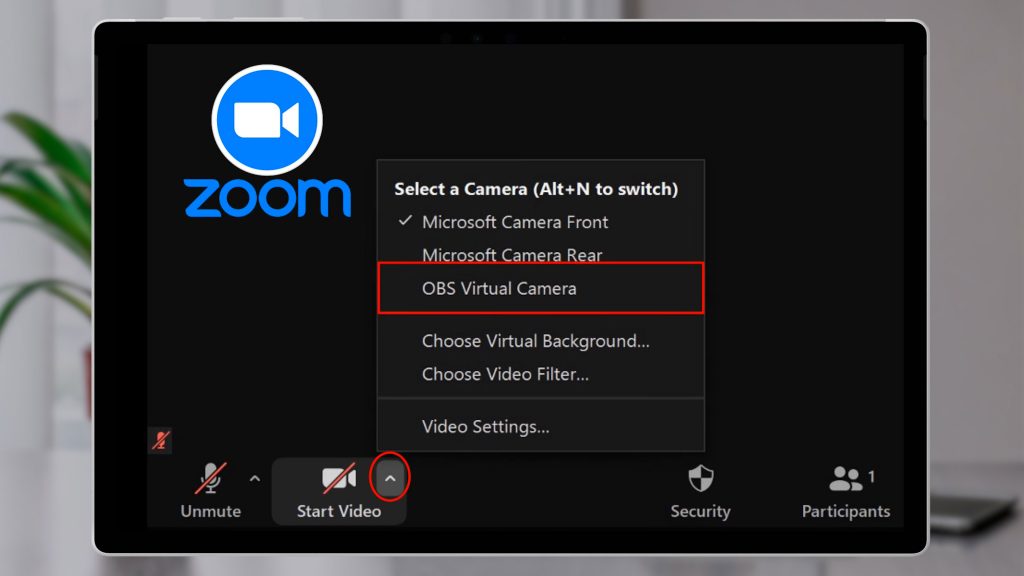
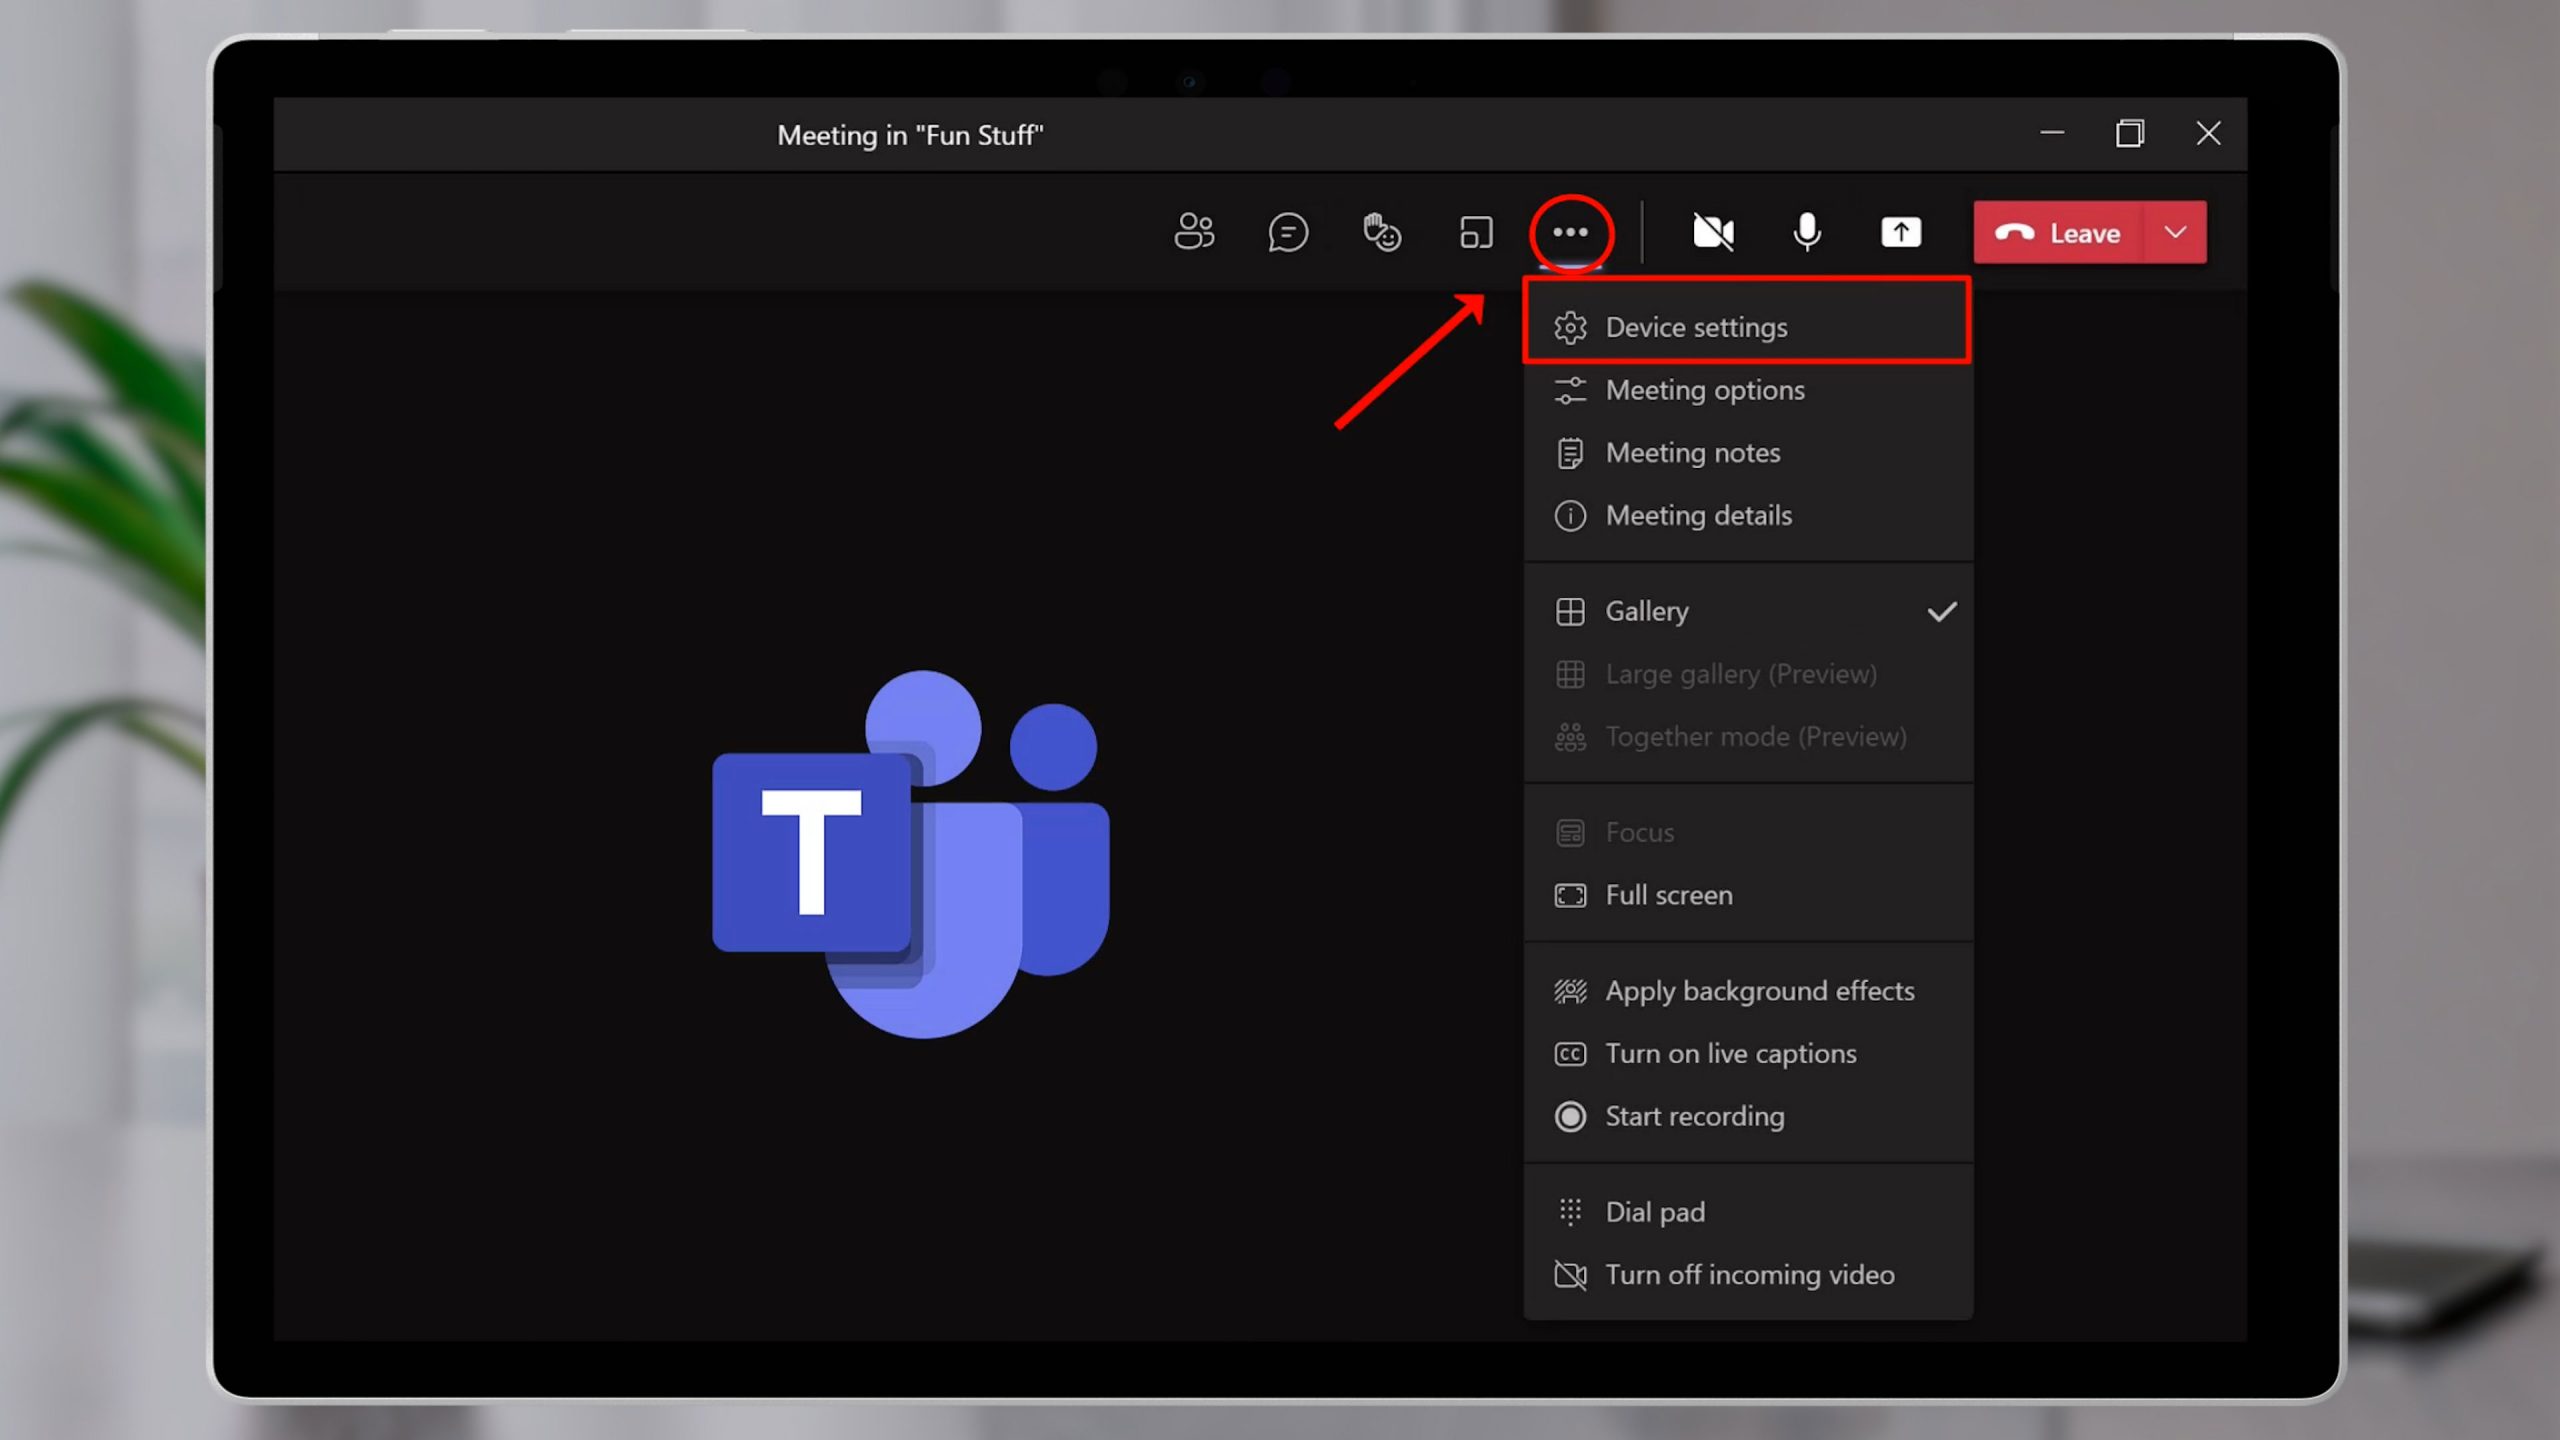
In Teams, when you’re in a call, select the three-dot menu > Device Settings and change the camera.
You should now be seeing your video from OBS appearing in your video call. Notice that the preview in Teams or Zoom is backwards! Don’t worry, everyone at the other end sees it the right way around. The preview in OBS is exactly what everyone else will see. So watch that and ignore the preview in Teams or Zoom.
Now you’re ready to use your Glass Board, so go for it and have fun!
By the way, you could set up OBS to be your main camera in both Teams and Zoom. But you would need to remember to have OBS running before any video call. In my experience having OBS running is going to consume between 3% and 10% of your processor at any time. That will impact your performance and battery life, so I generally wouldn’t recommend it. Just start it up when you need to do something special.
To go back to your normal camera setup, click “Stop Virtual Camera? in OBS and close OBS. If you were using your inbuilt webcam, give it a couple of seconds to free up the camera, then go back into your video call and select your usual webcam.
