One of my favourite features to teach people in Windows training is Snap. Windows Snap is a feature that allows you to quickly and easily split the screen in two using keyboard, mouse, pen or touch. So you can quickly get one app to sit perfectly alongside of another. This feature has been a part of windows in a similar form since Windows 7, oover 10 years! Yet surprisingly few people who use Windows on a daily basis at work know about it.
How to use Windows Snap
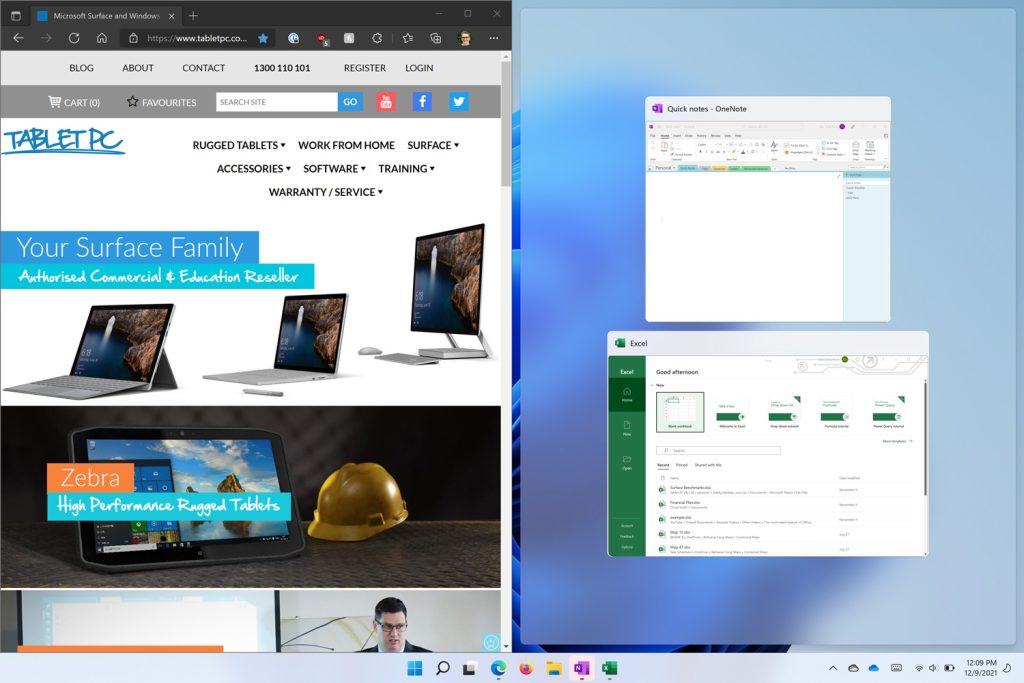
In windows 11 Snap has been improved with some new features that we’ll take a look at. Give snap a try by grabbing a an open window with your mouse from the in the app’s title bar. That’s the space that usually has the name of the app at the top of the window. Then drag the app until your mouse pointer (the arrow) touches the left or the right edge of the screen, somewhere around the middle. You’ll notice some visual feedback that tells you that your app is about to snap into that half of the screen. Let your mouse button go at this point and the window will fill that half of the screen.
On the other side of the screen you‘ll see a feature called snap assist that shows you all of the other apps that are currently open on your device. Click on one of those to have it fill the other space. So I might have a research paper on one side of the screen and OneNote on the other side of the screen where I’m taking some notes. You can do this with any app, sometimes even two copies of the same app. For example I could have two Excel Spreadsheets sitting side by side or two Word documents.
Try snap yourself!
Try this out with touch or pen, using your fingertip or pen tip exactly the same way as the mouse, dragging from the top bar until you touch the left or the right edge of the screen. It can be a little trickier to do with touch, but once you’ve mastered it, it will be a very handy tool in your digital skills repertoire.
Also, try dragging a Window from the title bar into the right or left corners at the top and bottom of the screen . You’ll notice that the app splits into a quarter rather than half. Drag a window to the top of the screen and the app will maximise.
You can do this with the keyboard too. The Windows Key and the Left or Right Arrow keys will snap the windows that you’re working with to the next left or right position on the screen. Try also using the Windows key with the up or down arrow to snap the window into a quarter or to minimise it.
What’s new with Windows 11?
Everything that we’ve shown so far you could do back in Windows 10. So what’s changed with windows 11? Point your mouse to the maximise button on the top right of a Window, pause for a second and you’ll see some new options for snap. This new layouts feature allows you to snap windows into different zones, depending on your screen size. For example if you have a wide or high resolution screen you may see the option to split apps into three vertical columns. There can be up to 6 different layout options here.
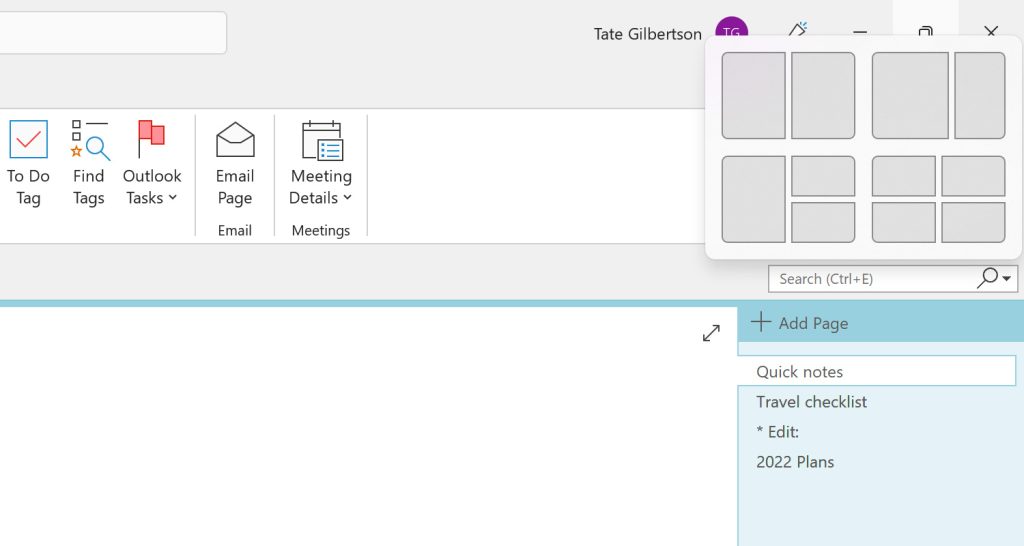
Point to the zone that you want the app to appear in and it will fit itself into that space. Once again the snap assist feature will appear in one of the other spaces showing you other open apps. Snap assist will appear in sequence to allow you to fill the other spaces. At the moment these new snap zones are automatically determined based on the size of your screen.
Snap Groups
Once you have your apps set up using the snap feature, Windows 11 will remember that these apps are connected together using a feature called snap groups. So let’s say that I have two apps split in half on the screen. Then I open a third app for a moment, but I want to get back to my original set of apps that were snapped together. Point to one of the app icons on the taskbar, pause for a moment, and you’ll see the app previews appear. Normally these app previews would show you all of the open windows for that app. But thanks to snap groups, you’ll see an extra option appearing here which is the group of apps that we snapped together. Clicking on that at preview will restore your set of apps too the front.
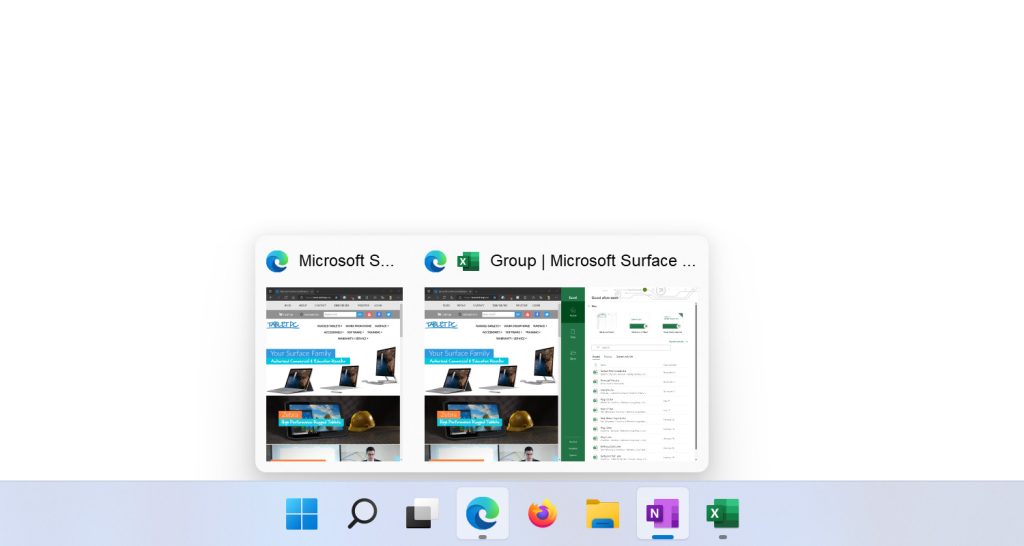
If you want to tweak the settings of windows snap, search for snap from your windows start menu . You can also go to the settings app > system and multi-tasking.
Go even further with Fancy Zones
But, if you want to go further there is an option. We’ve previously shown the tool fancy zones, which can be found in the Power Toys app released by Microsoft Garage. You can still use the Windows 10 Power Toys on Windows 11. So if you need more flexibility and customization with snap zones take a look at that app.
Now that you know about windows snap, give it a try on windows 11. And remember that practice makes progress . So if you don’t find it easy the first time give it a few more tries until you’ve mastered it. Make sure you check out our whole series on Windows 11 over on our Youtube Channel!
