Tablet mode is gone in Windows 11, clearing out the last legacies of the ill-fated Windows 8. Although the specific Tablet mode is gone, there are many touch and pen improvements to be had in Windows 11. We’ll take a closer look at the changes to the Touch Keyboard and Handwriting Recognition in another article. So for this one, we will focus on how to use your Windows 11 device with Touch and Pen, and then we’ll see what’s new.
With a touch screen Windows device like a Surface, you can still tap with your fingertip to click, just like you could in Windows 10. Press and hold to right click. And you can drag and drop, just like could with a mouse.
If you have a pen like the Surface Pen, you can hover your pen near the screen to move the cursor. Tap to click, or press and hold to right click. With a pen, it’s usually easier to hold the right click shortcut button down and tap the screen to right click. So controlling your PC with touch and pen in Windows 11 is much the same as it was in Windows 10.
New Touch and Pen improvements with Windows 11
But what’s new Windows 11 is multi-touch gestures. You can now use three and four finger swipe gestures on your touch screen to perform Windows actions. For example, swipe down with three fingers will minimise all apps and show the desktop. And swiping left or right with three fingers will switch between apps, like pressing Alt-Tab on your keyboard.
These are the same multi-touch gestures that you can use on your track pad.
To make sure this is on, go to the settings app, Bluetooth and Devices > Touch. Make sure “Three- and four-finger touch gestures” is on.
These gestures are linked directly to the touchpad gestures, so If you want to change what the gestures do, you’ll need to jump over to Bluetooth and Devices > Touchpad and check out the Three-finger and Four-Finger Gestures.
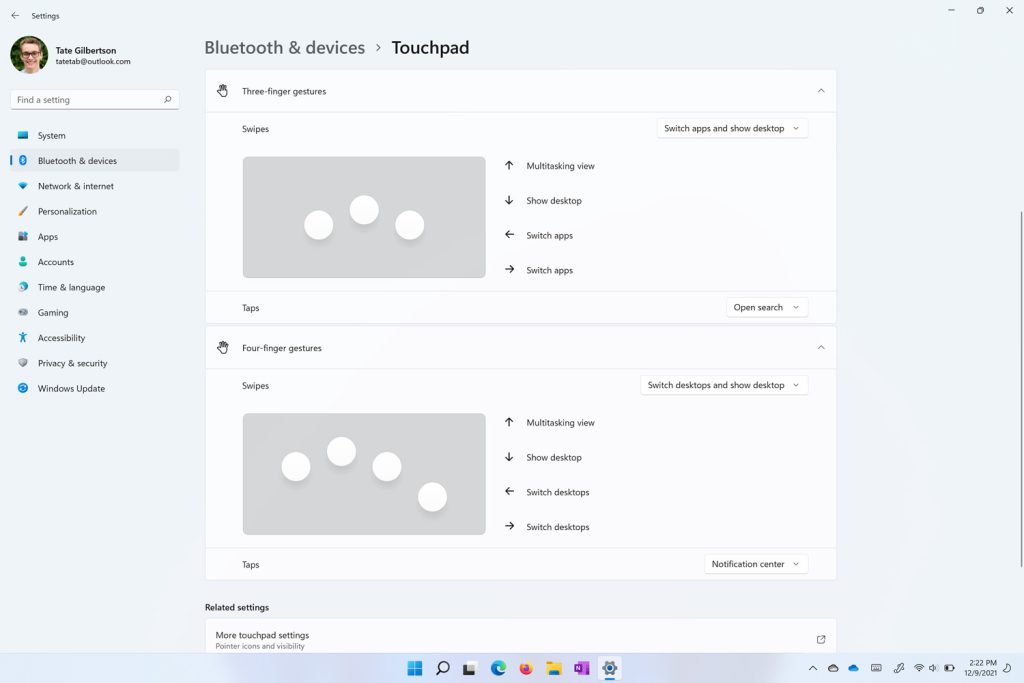
By default, a three finger Swipe Up Gesture will show you the task view. Take a look at the four finger gestures too. And once you have them set up how you would like, give them a try on your touch pad, and on your touch screen.
More Touch friendly
Rather than having a dedicated touch mode, Windows elements will adapt automatically when you’re using touch. So if detach your Keyboard or fold it around to the back Windows will automatically resize the taskbar icons to give you more target space.
Windows are now much easier to resize with touch too. Give it a try. Grab the corner edge of a Window with your fingertip and try resizing a window. Also, try using the Windows snap feature with touch. We discussed Windows Snap in a previous video that you can find here.
Upgrades to the pen experience
There are also some new options for pens. In the settings app under Bluetooth and Devices > Go to Pen & Windows Ink. As always, you can set palm rejection to work in Right or Left handed mode right at the top.
If you have a pen with a Bluetooth click button on the end, like my Surface Pen, you can tap on the option “Choose what your shortcut button does.” There you can decide what happens when you click, double click or press and hold that button.
If you’re going to use these actions, you’ll need to make sure that your pen is Bluetooth paired with your device. To check if your pen is paired, you can try it out. Click the button and it should perform the action listed there – the default is ‘pen menu.’ So you should see a pop up in the bottom right corner with the pen menu.
So if it doesn’t pop up, there’s a handy link there – Pair Pen. That link takes you over to the Bluetooth page where you can add a new Bluetooth device. To Pair your pen you’ll need to hold down the pen button – usually the eraser end – for about 7 seconds to enter pair mode. Then then it should appear in the list, tap on it to pair. Once it’s done, try clicking the button again.
The new Pen Menu
The Pen Menu is new in Windows 11. This small app pops up on the bottom right of the screen when you click the button. Certain pens, like the Surface Slim Pen and Keyboard combo on the Surface Pro X and Surface Pro 8 will automatically launch this menu whenever your pick the pen up from its keyboard charging base.
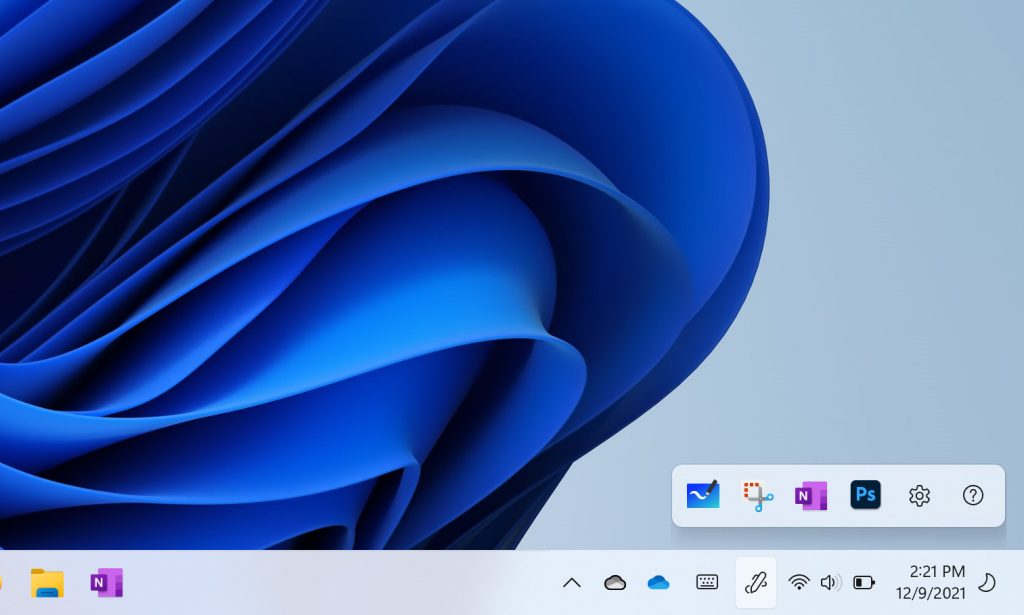
When you see this pen menu, you’ll notice a handy shortcut to the Snipping Tool, and the Whiteboard App – two very handy apps that work brilliantly with your pen. You can click on the settings button on this pen menu and change what apps appear there. You can have up to four pen friendly apps appear on this menu, so select the ones that you use the most.
Customise your pen
Back in the settings app, you might want to change what the other pen clicks do. Drop down the list and select a specific app that you want to open for the action. I’ll leave the pen menu for single click, and double click is going to be OneNote, and on ‘press and hold’ I’ll set it to the Concepts app. Done!
Under additional pen settings, you can set some more options for the pen like turning the cursor off. When you’re moving your pen around on the screen, the cursor can be distracting. A lot of people like to turn it off, and this was a setting that was there under Windows 10, but it didn’t work for several years. Finally, they seem to have fixed it in Windows 11 and it works properly.
Use Touch and Pen!
So there are some basics to get you started with Windows 11 on a touch and pen device. In 2021 I believe that every computing device should have more than a keyboard and mouse. Windows 11 devices like my Surface Pro give you the flexibility to move from laptop, to tablet, to media device – enabling you to achieve greater focus, creativity, and productivity. So if you’re never used your pen or touch screen, it’s time to go multi-modal!
Here’s a link to our series on the science behind the digital Pen. If you want to remember details from meetings, solve problems that are blocking you or work more effectively with you team, then you need to start there. Make sure you subscribe now to learn more about multi-modal computing on Windows 11.
